|
By having a stamp, I don’t mean, something with ink that you press on. I mean, something when people see it, they identify it with you. You might also call it a signature or trademark. It’s something that appears over and over in your work. I don’t think this is something you can force. I think it has to happen organically In my painting “Orangutan Hanging Out,” I painted a very dark blackish green background as part of the jungle atmosphere 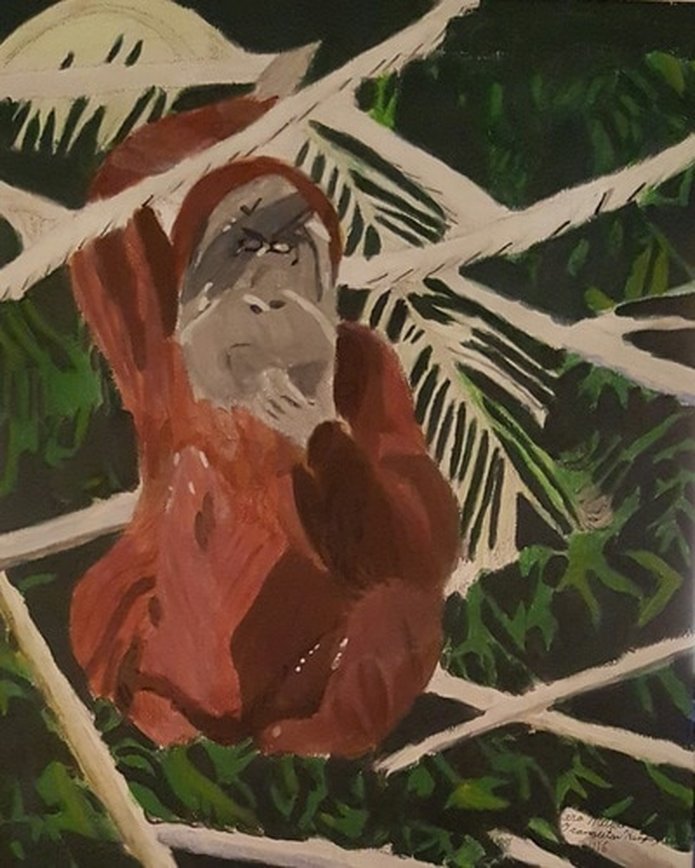 In my painting, “Incoming Swan”, I painted a very dark blackish green background as part of the leaves on the bank, 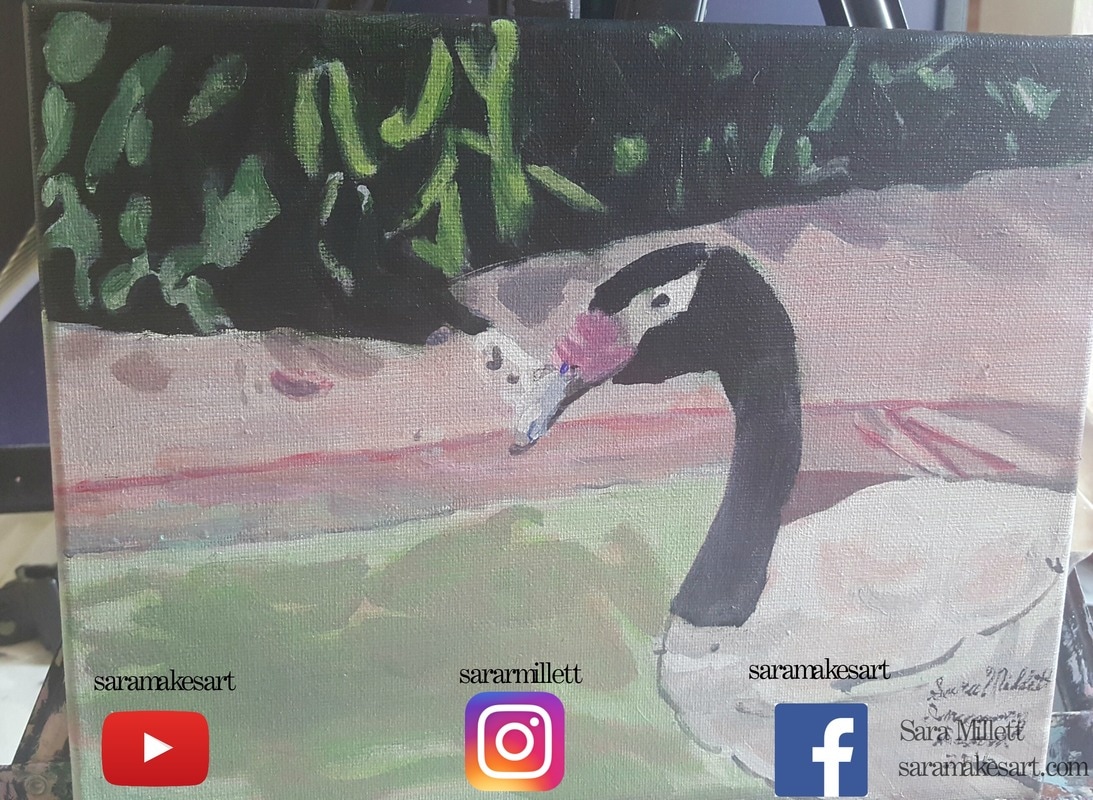 and now, in my current painting, I’m making again, a very dark, blackish green background to offset the leaves and branches 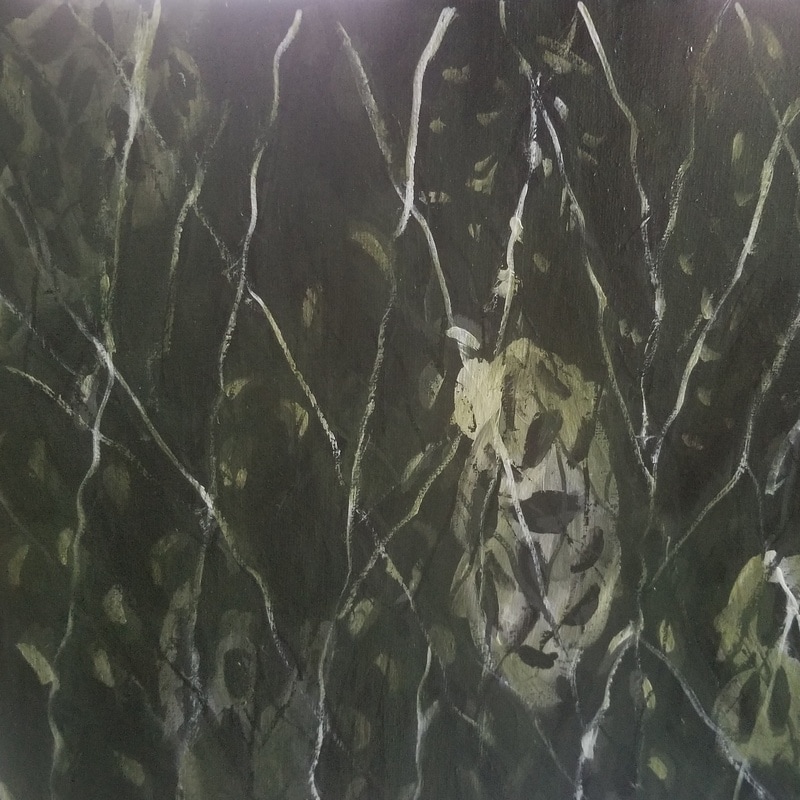 I’m starting to understand by now, and I’m sure you’re starting to understand by now, that I really like making really dark green backgrounds when I paint jungles, forests, or just leaves in general. For me, the darker the background is the better. I never set out to continuously make very dark green, almost black, backgrounds with leaves for my pieces over and over again. I just find myself drawn to it, even when my reference photo doesn’t call for it. The thought did cross my mind that maybe I should put this type of background to rest. After all, I’ve done it three times already. But no, I like this background and I’m going to keep making it as much as I want. It’s become one of my stamps, one of the things that will identify a piece as mine. And the more things there are in my pieces that will tell people that it’s a “Sara Millett”, even before people see my name on the painting or the post, the better Now I have a question for you. Is there anything you find yourself doing over in over in your art, whether visual or otherwise that’s becoming a signature for you? Share in the comments. video
0 Comments
I mentioned her in one of my posts before, but in Roberto Blake’s video “5 Steps to Defining Your Personal Brand with Amy Schmittauer” Amy said “Know how you help people. ‘Cause if you don’t help people, you got nothin’". Ouch, ‘sounds harsh. It can be hard to figure out how something like paintings and drawings help people. I know that making them helps me tremendously, but most people don’t think of art as a pressing need. So how does art help people? Well, while googling “health benefits of looking at art”, I found this article from parkwestgallery.com, that said that both creating and consuming art and music results in lower levels of anxiety and depression and greater satisfaction with one’s life in both men and women. It went on to state that it was found that viewing art improves critical thinking skills. So, to be fair, just making paintings and drawings doesn’t help anyone, except us as the artist. But by making paintings and drawings and sharing them, we can help improve people’s mental health and make them happier with their own lives. I think that’s pretty major. And if nothing else, art helps people enjoy their space more. If you’re a creator or consumer of the arts, what are your thoughts on what I just talked about? Please share in the comments. video I was watching a video about what is art and the topic of color choice came up. My former stepfather liked to tell a story that I was “interviewed” by someone from an art magazine and when he asked me how I choose my colors, my reply was “that’s what I have in my box”. That interaction never happened, but the memory of that story and the video I watched gave me the idea to talk about how I really choose my colors. I’ve already talked about the importance of using lots of colors to create depth and specifically about the role of color in creating fur, and I’ll put cards up for both of those. So now I’m gonna get into the ways I choose my colors. The first and most common way that I choose colors is by what I see. I literally look at my reference photo and try to choose or mix colors as closely as possible to it. The second way that I choose colors is by what I personally like. Like I just said, I usually follow the colors in my reference photo pretty closely, but I if I feel like taking some artistic liberties with the color, I have no problem doing that as long as it could still be believable. For example, I probably wouldn’t paint a blue dog. But if someone’s shirt was cobalt blue, I might paint it cureulean blue if I felt like it. Color is not even the most important thing really. Value is. The third way that I choose colors is what will work best for the painting. An example of this is my painting of Shantih from 2015. 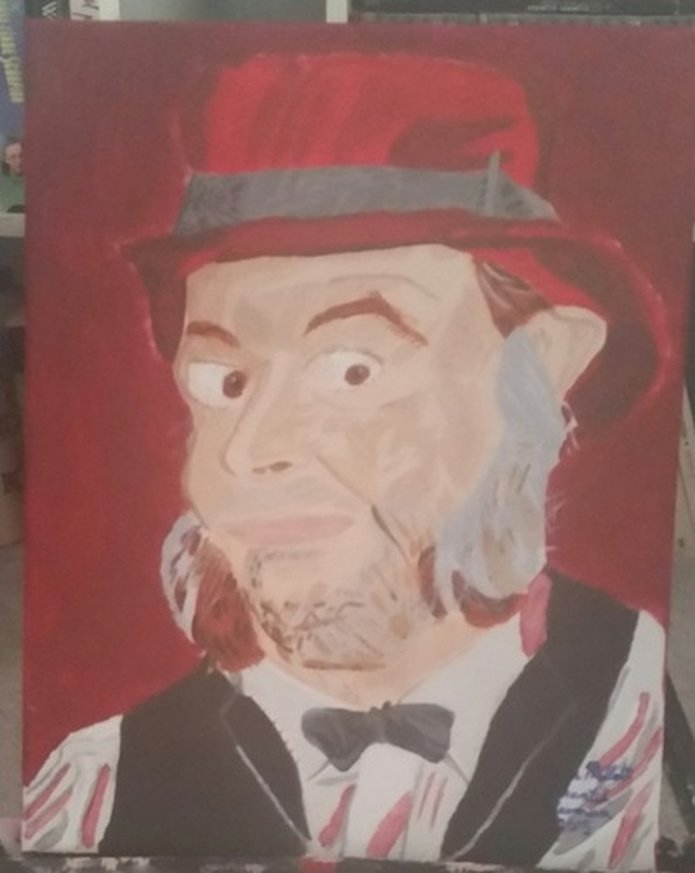 In the reference photo I took, his hat is more like a dark maroon color, similar to what I painted the background. So of course I couldn’t paint the hat the same color it was in the reference photo,’cause it wouldn’t stand out enough. So I decided to paint it a brighter red. When doing portraits, I try to choose a background color that provides some contrast with the subject’s skin. I like to use colored or black backgrounds with portraits rather than brown or beige ones usually but I broke my rule with this portrait of Kit Medina. 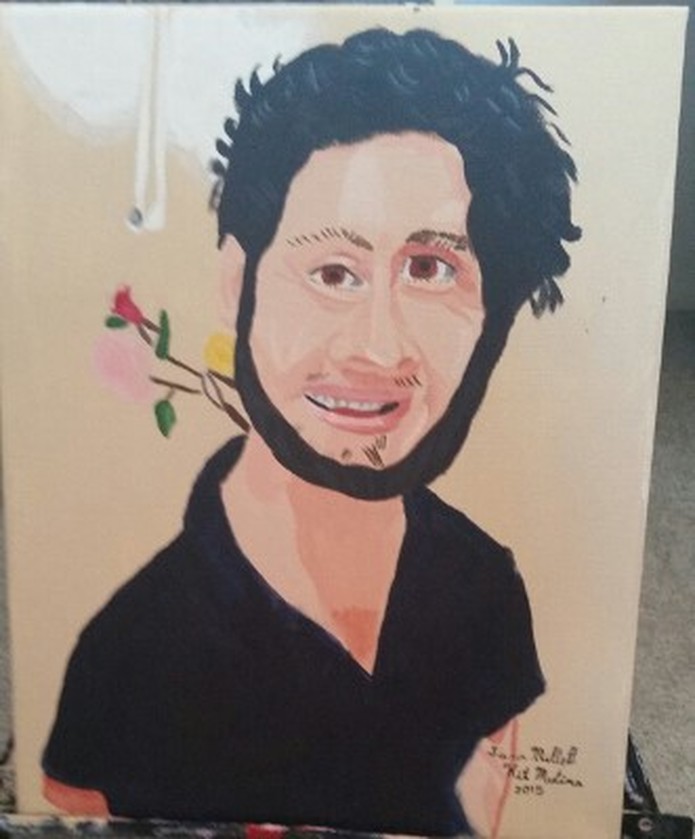 While I was painting it, I thought Kit looked a ghost; he was blending in to the background so much. I knew I would need to amp up the rosiness in his skin to make him look like he was separate from the wall and was in fact a living, breathing person and not a ghost. The last and least common way that I personally choose colors is symbolism. Every once in a while, I’ll choose colors based on what they represent because of what I’m trying to portray. I did this in my painting “Woman With Cabinet”. 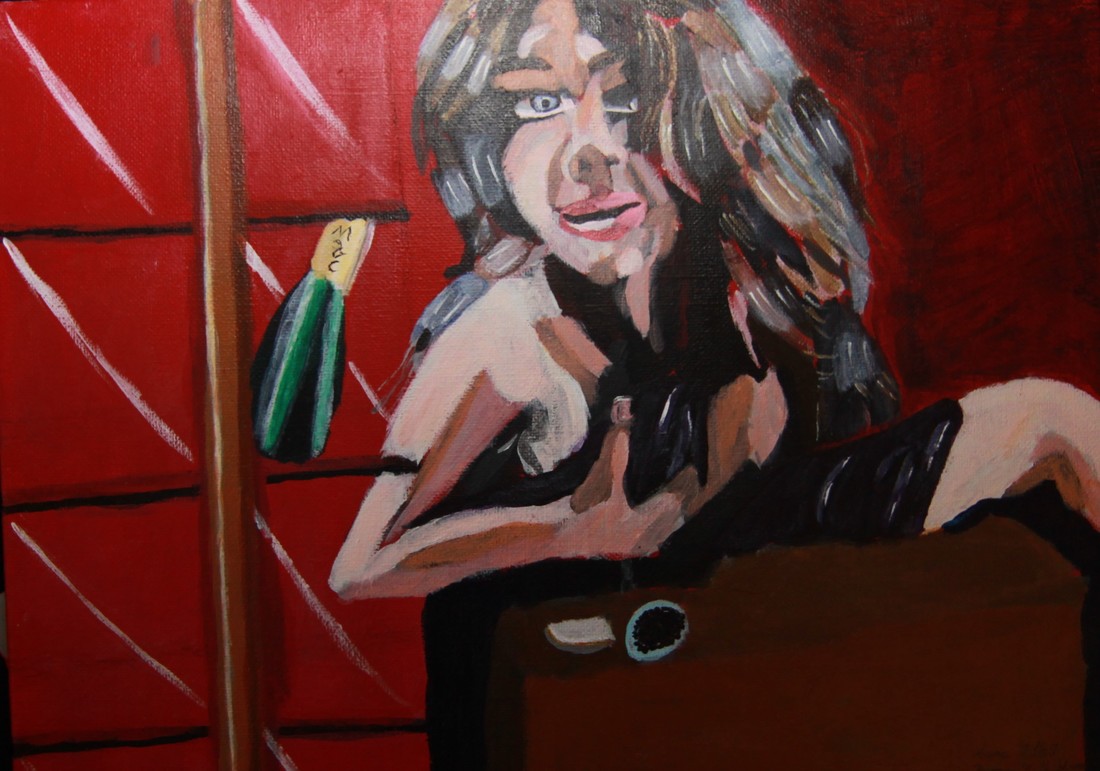 The painting is inspired by the lyrics to the song “Killer Queen” written by Freddie Mercury. The woman in my painting is supposed to be a representation of who Freddie is singing about. I read that Freddie had said that the song was about a high class call girl. Based on that information and the fact that the song has the song has the word queen in the title, my goal was to create a regal whore. So I chose the red background because red is commonly associated with lust and passion and, for a long time, was in even closely associated with prostitutes. I chose the dark purple for her bed sheet and the dark blue for her mattress, because those colors are very closely associated with royalty. So those are the ways that I choose colors. I hope you enjoyed. video 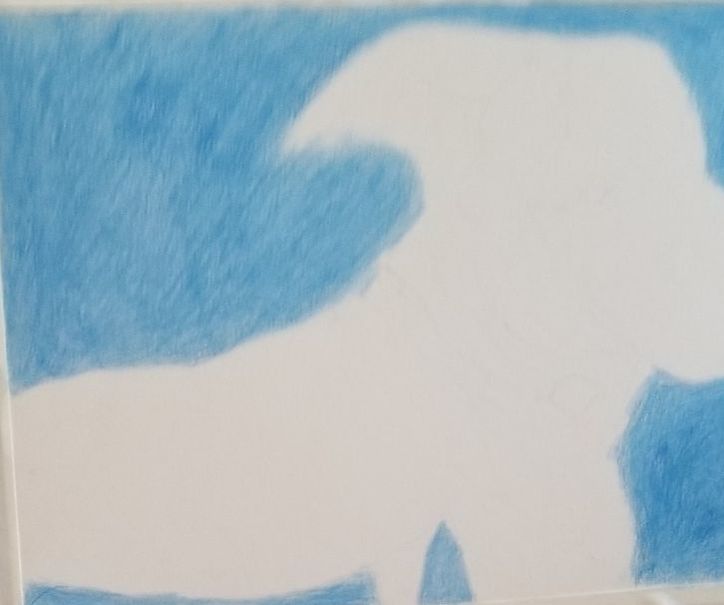 I started with a sketch in a 6h pencil, then used a phthalo blue pencil for the background, blending with odorless mineral spirits.  For Tyler's eye, I used shades of burnt sienna, van dyke brown, bistre, warm gray layered over that, and black, as well as light ultramarine, and helio blue for the shine in her pupil. For the rim around her eye, I layered helio blue and paynes gray, alternating between the two colors regularly. 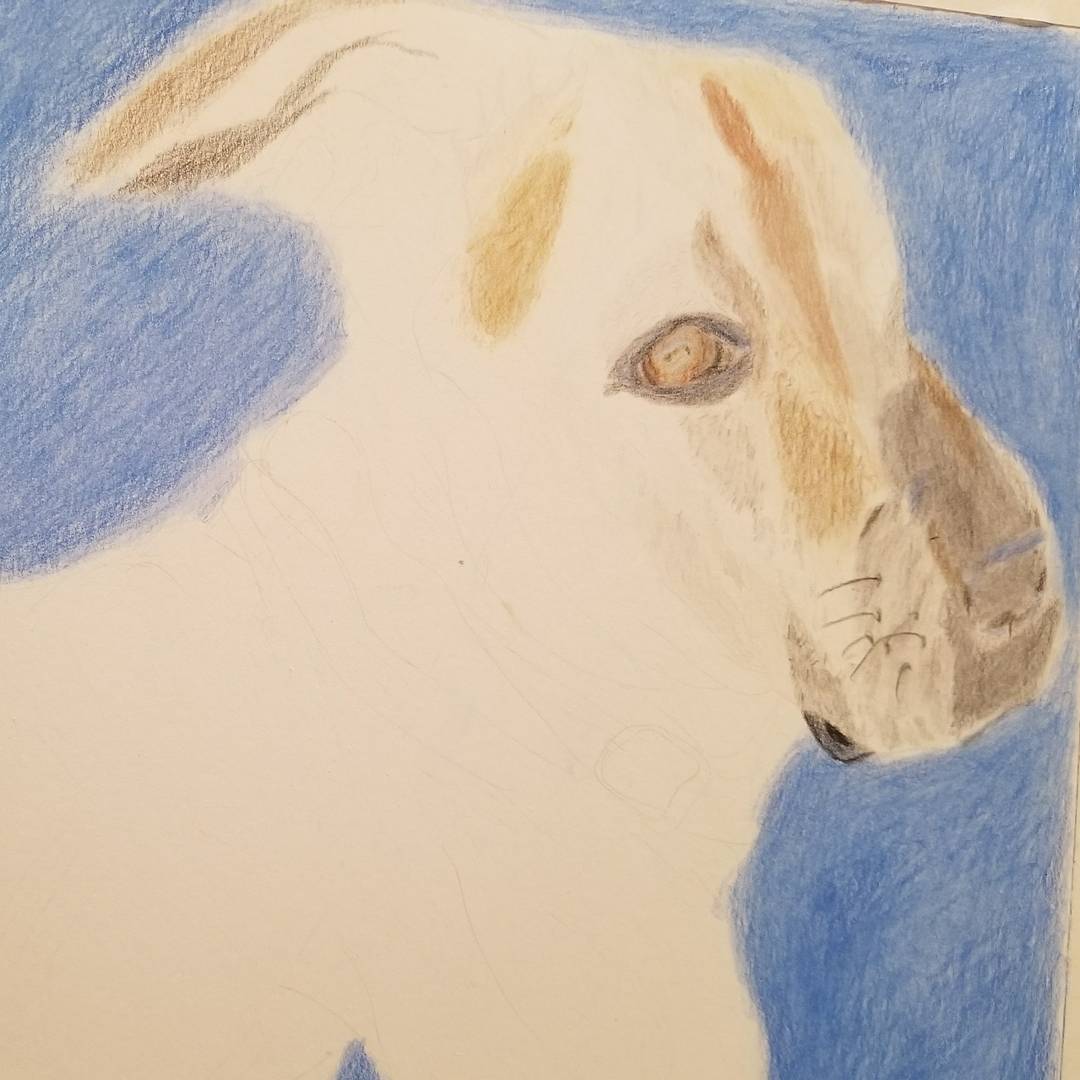 For the brown parts of her fur, I've decided to layer raw umber and burnt sienna. I've been blocking off small areas with masking fluid and filling them in with pale gray to create fur texture. 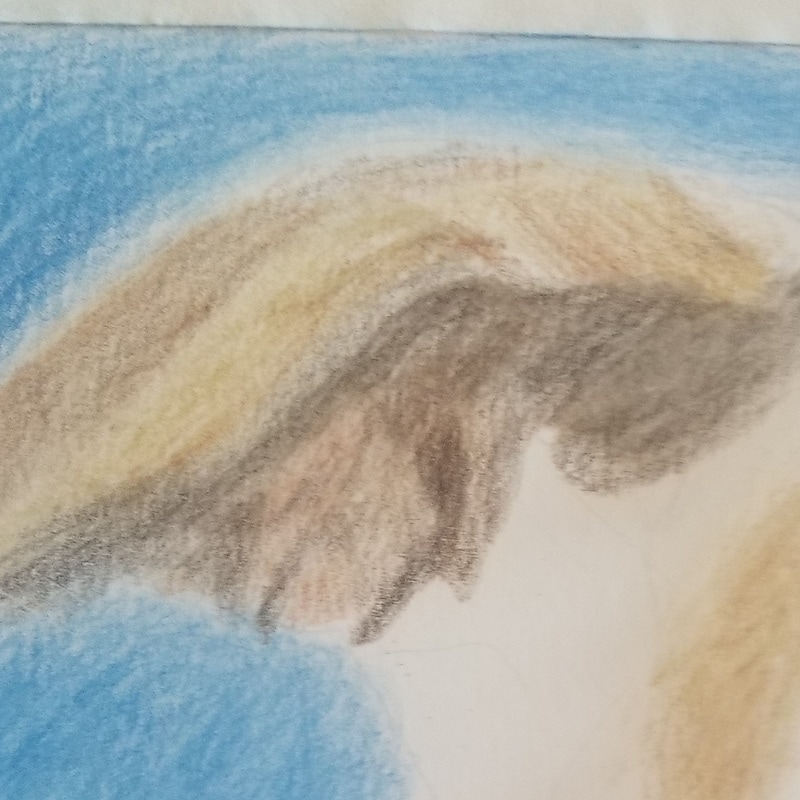 For Tyler's ear, I used different shades of brown, including sepia, van dyke, which I layered over with black and burnt umber, raw umber, and burnt sienna. 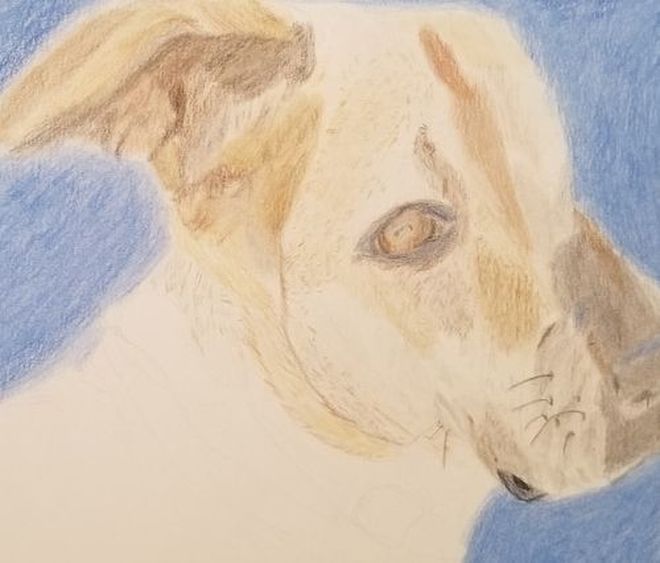 I'm making curved vertical lines over my base colors to suggest the wrinkles in her skin. 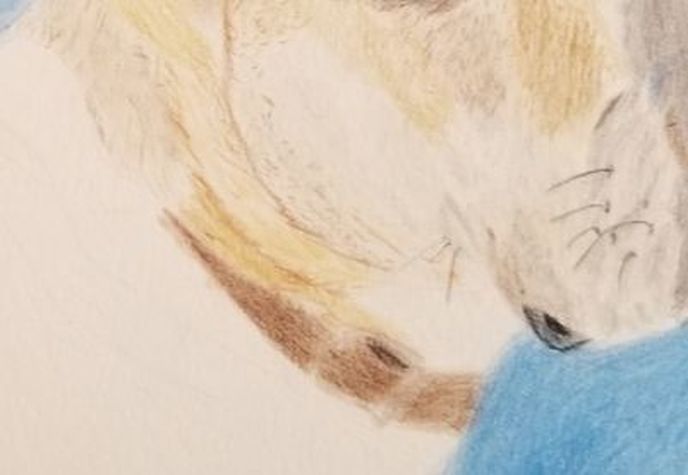 I used van dyke brown for her collar, making a zigzag pattern in part of it to show that her fur was overlapping there. I layered black over where there was a shadow. For the buckle, I used three different shades of gray, being careful to leave the white of the paper to create shine. 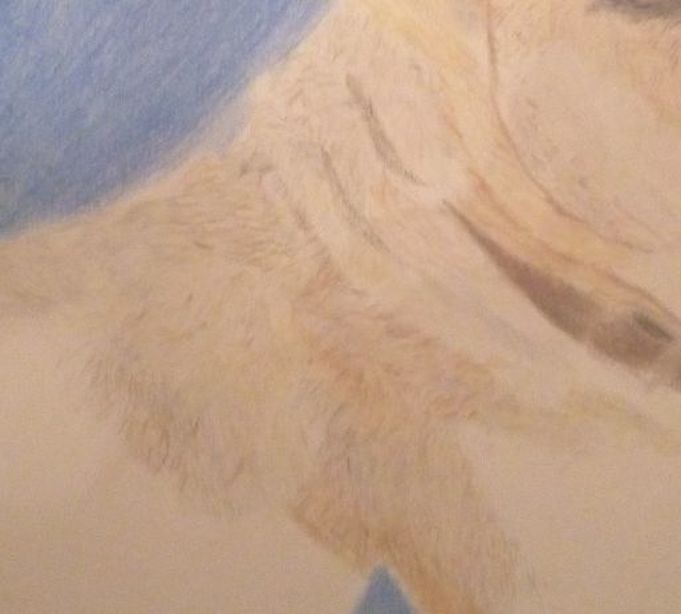 I'm making long curved strokes with my pencils to suggest the shagginess of her fur in this particular area. 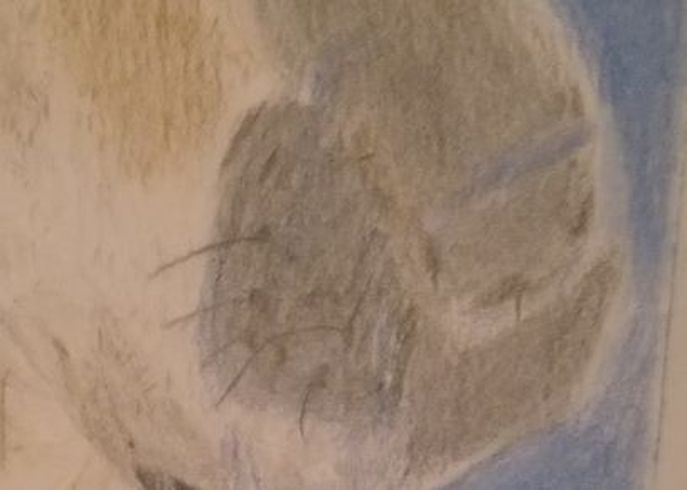 I put a layer of blue down on her snout, then went over it with cold gray V and dark sepia, covering most of the blue. I intensified the holes of her whiskers with paynes gray. 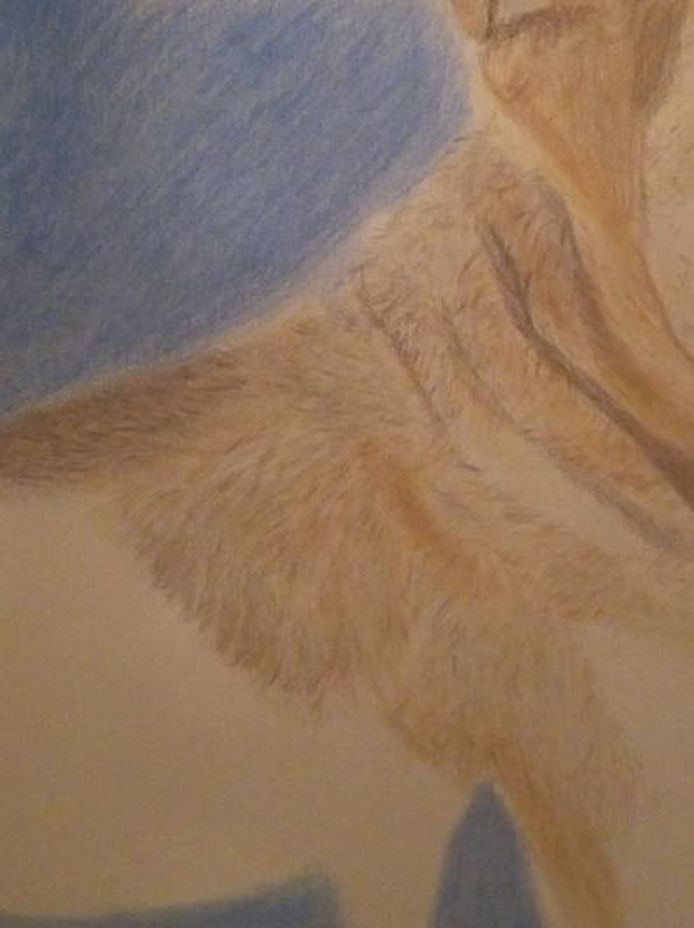 I've added even more depth to her wrinkles by darkening the color in between them. 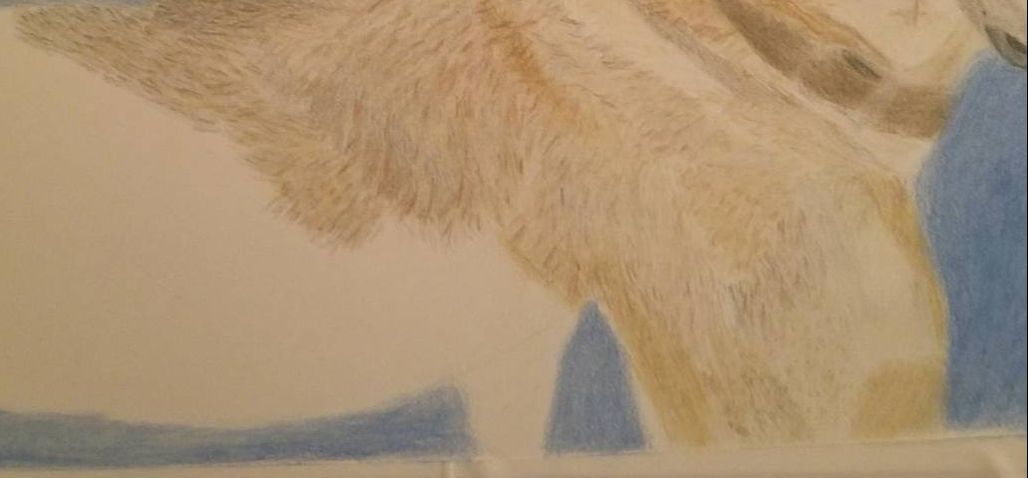 Today, I finished Tyler's right foreleg and started on her back. I used cold gray V, raw umber, burnt sienna, and van dyke brown. I started with the gray, and, after laying down all the other colors, went back to the gray and filled in the area until the background was almost covered. 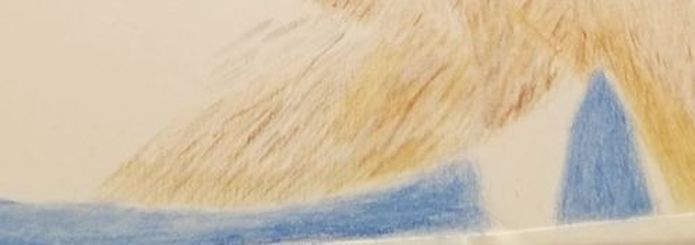 Using the side of a warm gray 5 pencil, I made lines, curving down going from right to left. I added raw umber and burnt sienna, keeping my pencil strokes going in the same direction. 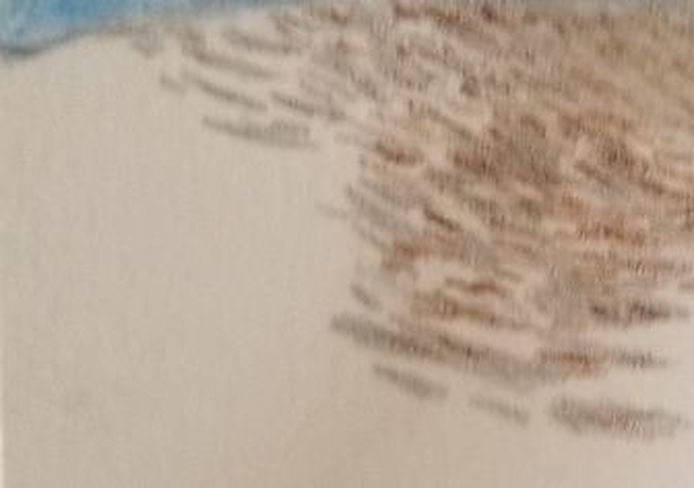 Right now I'm focusing on making shapes, rather than lines. 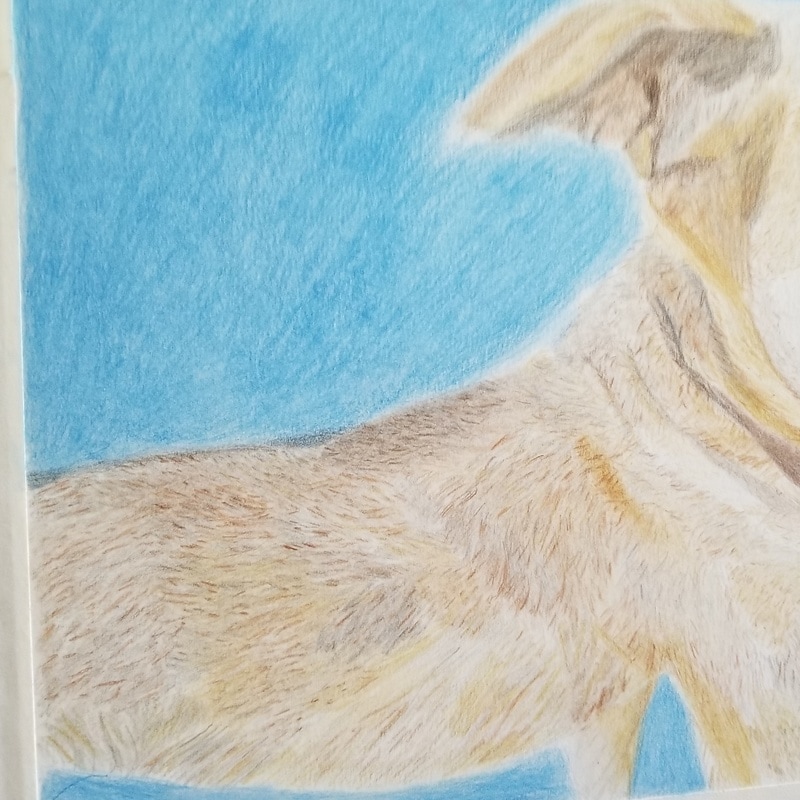 Here's "Tyler The Dog" pretty much done. I've added a bit more burnt sienna to the shaggier part of her coat and filled in more warm gray 5. I also used my Derwent Chinese white to lighten some areas. I used cold gray 5 along the top of Tyler's back to adjust the shape of her body. 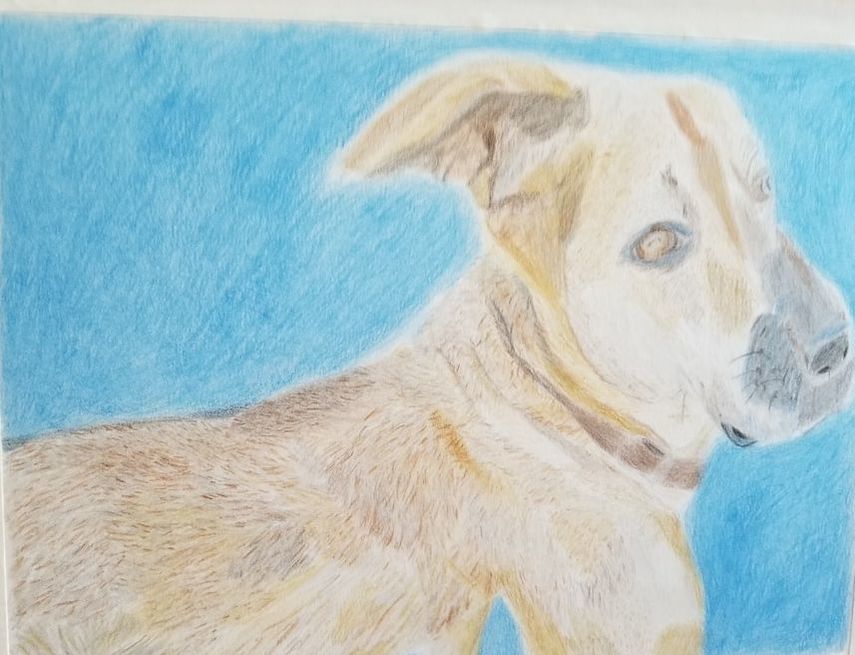 Finished! This is another example of the importance of judging a piece independently of the reference photo. There seemed to be hard lines in her fur on the photo, but in my drawing those were making her fur look too wiry, so I softened them.
In this post, I have a quick tip for you and that’s to back up from your work every once in a while, while painting or drawing and look at it from a distance. Always looking at something up close, like you are while working, doesn’t give you a clear picture of how it’s coming along, and you may add unnecessary details. If you look at something your work a few feet away, you might see that it’s looking better than you thought it was. If you’re working with your piece upright, this is easy just move your chair, or take a few steps back. If you’re working with your piece flat, pick it up and hold it away from you like this. Alternatively, you could just stand up for a few seconds. Also, if you work is displayed in a gallery, most people will be viewing from about one or two feet away anyway, so backing up from your work and viewing it from this distance will give you a better idea of how other people will see your work. Something I’ve been trying to remember to do and something I suggest you do, is to photograph your work from a bit of a distance to, like one or two feet, since this will give a more pleasant viewing experience. video The title of this post is a paraphrase of a quote by Pablo Picasso. The exact quote is “Inspiration exists, but it has to find you working”. I saw this quote on Twitter recently and it’s been proverbially kicking me in the butt these past couple of days. That quote has been replaying in my mind as I’d been frustrated knowing I was due to film some more videos for my youtube channel today and not knowing what to talk about. Obviously now I have something to talk about which is this quote and my thoughts about it. What I think Picasso was saying is that while so many creative people want to sit around waiting for inspiration to come to them, you have to get to work on your craft, and then inspiration will come. Obviously now I have something to talk about which is this quote and my thoughts about it. What I think Picasso was saying is that while so many creative people want to sit around waiting for inspiration to come to them, you have to get to work on your craft, and then inspiration will come. Thinking about this quote reminds me that if I’m having a creative block, and not being productive, I have no right to complain. I’ve written before about the importance of consistent work and this is just another reason. No creative likes creative block, so keep working to keep the block away. video The following is a repost from my wordpress blog. 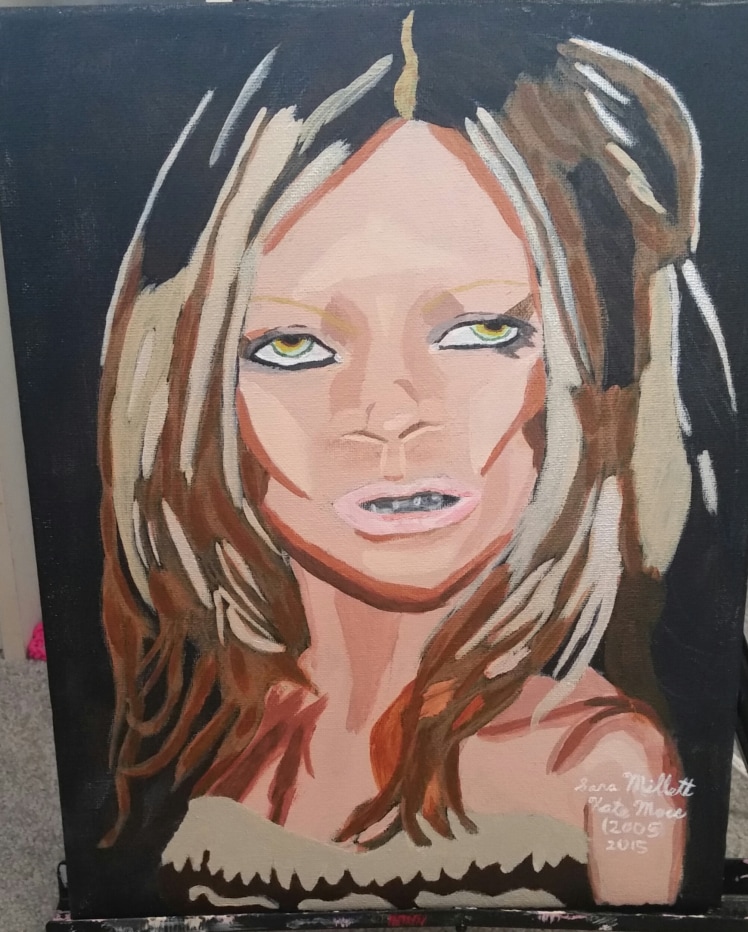 My latest portrait is of Kate Moss at the 2005 CFDA Awards, in which she was being honored as a style icon. The painting is an 11×14 acrylic on Art Alternatives Studio Canvas.The photo was taken by Evan Agostini and was used with his permission. Without further ado, I’m going to go over various aspects of the painting and share my thoughts on them. I’ve painted the flesh using a combination of white, blue, red, and yellow. I used a little more red and yellow than the other colors because I was going for a peachy effect.  When I looked at my photo, I noticed her eyes had a lot of different colors in them so I mixed white and green with grey, yellow with raw sienna and yellow with burnt umber to make the colors for the iris. Then I mixed a darker version of the grey green for the rim around her eyes. I was very concerned about getting the eye shape right and that included getting the makeup correct, which meant making it darker and thicker on the outer corners.  I did the mouth by layering different shades of pink on top of each other, starting very light and gradually getting darker, and letting my bottom layer so through. As always, corneas and teeth are mostly grey with just a little bit of white. 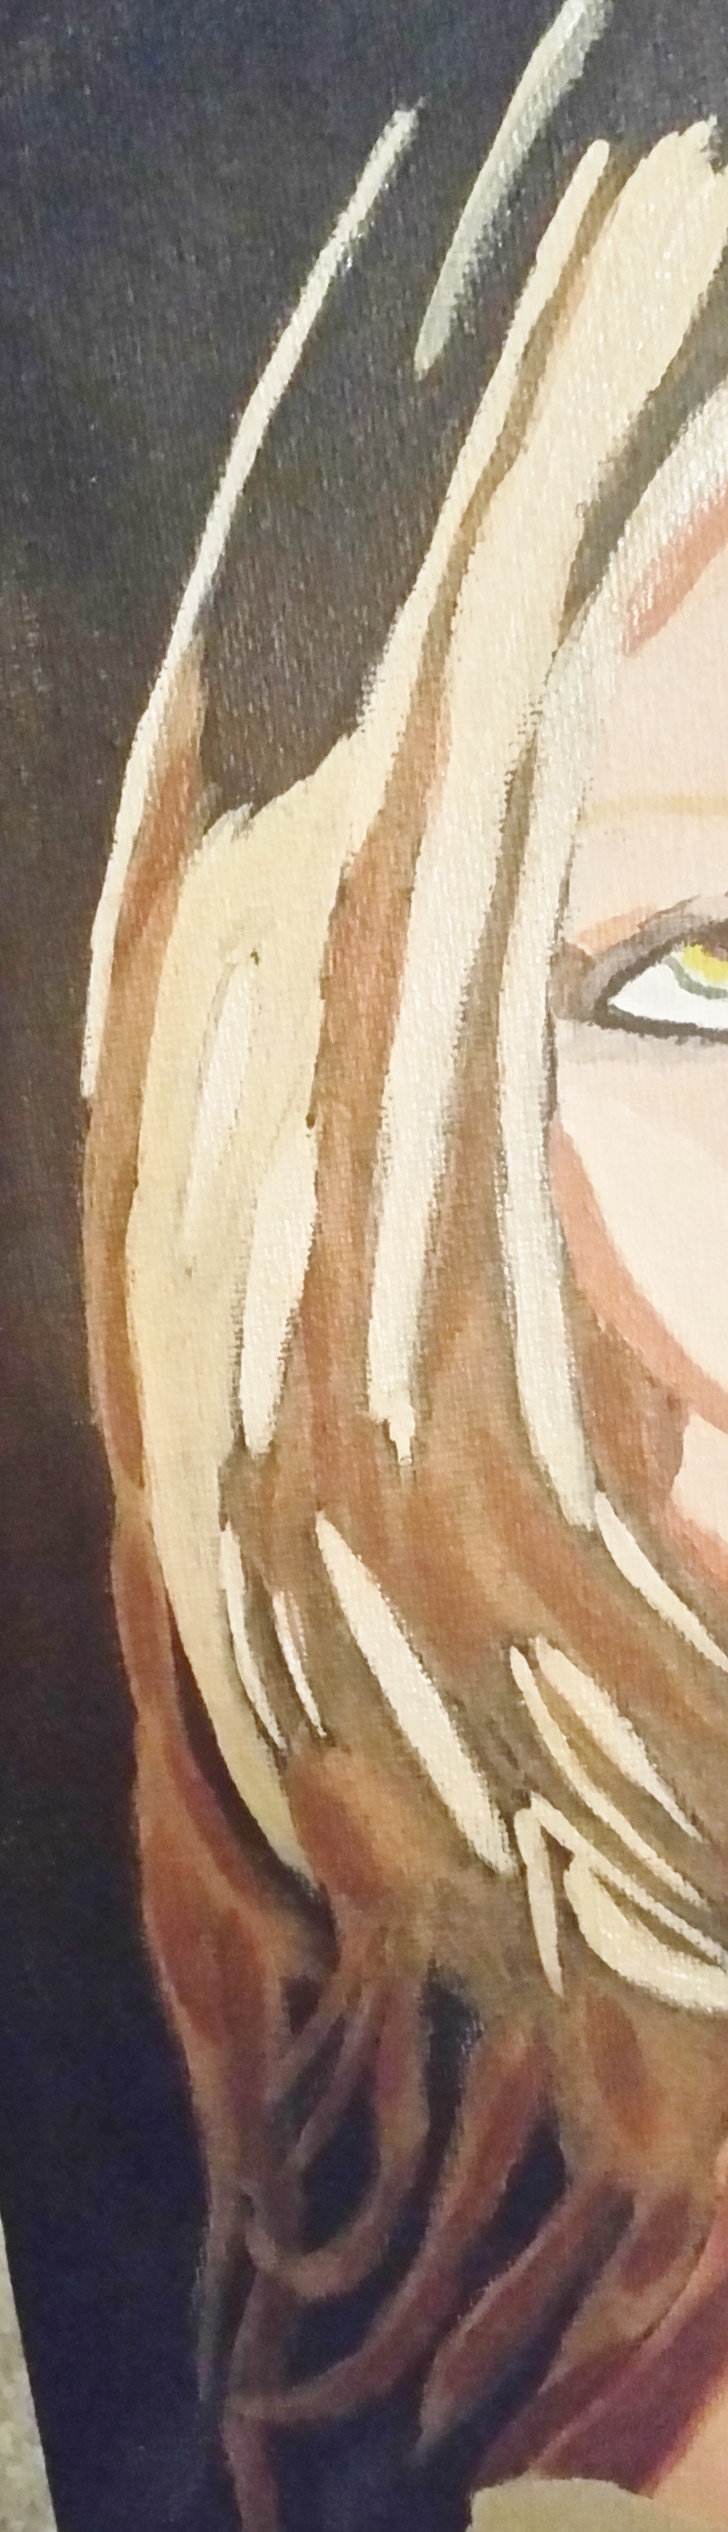 For the hair I mixed white, yellow and purple. This combination made the lightest shade you see. I mixed in a little more yellow and purple to make the slightly darker color that you see here. I went back mixed up that same color again and used it for her eyebrows. Then I mixed burnt sienna into that color, because I saw that some parts of her hair were a bit reddish. I tried going over the palest parts of her hair with transparent mixing white, mixed very thinly to make it shinier. Before I did all this though, I filled in some parts of her hair with a combination of burnt umber and black and an even darker version of this color over top of that. I decided to go over the lightest parts of her hair with a mixture of iridescent medium and matte medium to create extra shine. I’d been wanting to experiment with iridescent medium for a long time and this seemed like the perfect opportunity.  The biggest thing I wanted to get right were her cheekbones, which are iconic. I tried my best to follow my reference photo as closely as possible, and used very dark shading underneath to make them really pop.  I decided the trim on her dress needed to be more taupey, so I remixed the color to give it more of a grayish tone and repainted that area. I then used a combination of burnt umber and burnt sienna mixed together to paint the rest of her clothes. video I’ve already made a post about how I need to use a lot of colors to create depth and today I’m going to revisit that concept. As I’ve been working on my current piece, which is a colored pencil portrait of my neighbor’s dog, during the live streams I’ve been doing for it, I find myself repeating that I need to use at least four or five different pencils in any given area before it starts to look like fur. 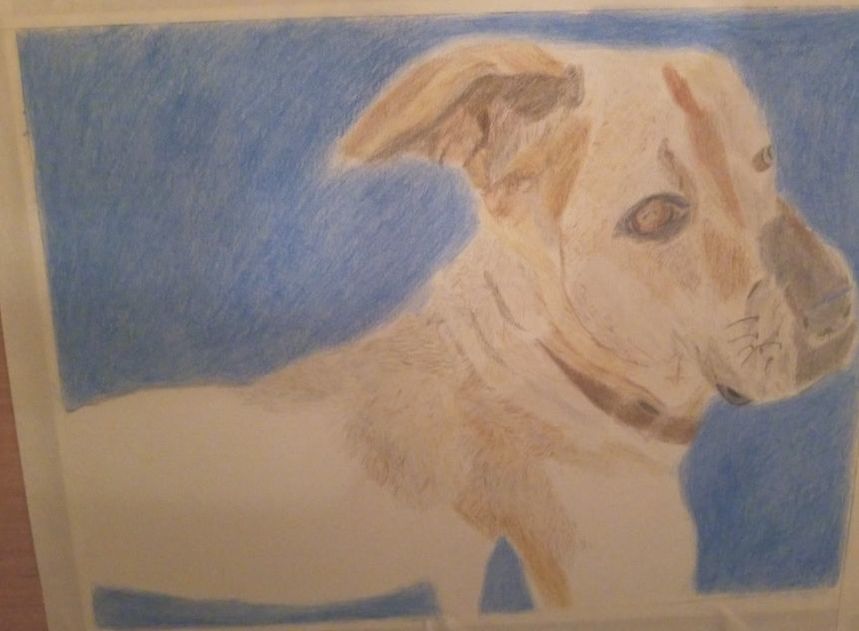 The pencils I’ve been using are raw umber, burnt sienna, burnt umber, and at least two shades of gray. I make small marks with all of these pencils close to another so that, from a distance, it looks like a mass of fur. If I used only burnt sienna, or only gray, for example, even if I made all the lines the exact right length and put them in the exact right place, it still wouldn’t look like fur. It would just look like a bunch of lines. The truth is I’m not putting all the lines in the exact right place, nor am I making them all the exact right length, but because I’m using multiple colors of pencils, I coming out with something that looks like fur. I can look at my reference photo and look here and see that I’m still not done. I need more dark gray right in here for one thing. 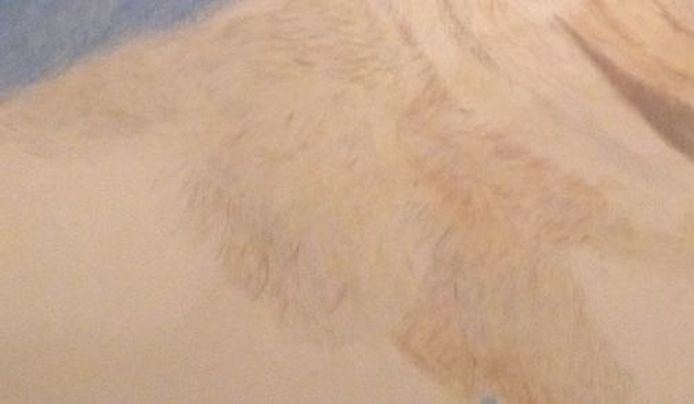 You don’t necessarily have to use the exact same colors that are in your reference photo. You just need to use multiple colors if you want your work to be even close to realistic. Even if you’re working in black and white, you need to use multiple shades. I wanted to make this post mainly about the use of color , but I’m gonna mention one more thing about fur. You don’t have to have all your strokes in the exact right place. You don’t have to have all your fur strokes the exact right length. But you do have to have them going in the right general direction. That is what will give you the texture you want. Also, the way the fur lies indicates the underlying muscle structure, so if you have your fur going the wrong way, you could end up drawing what looks like a deformed animal. That's all for now. I'll see you again soon. video |