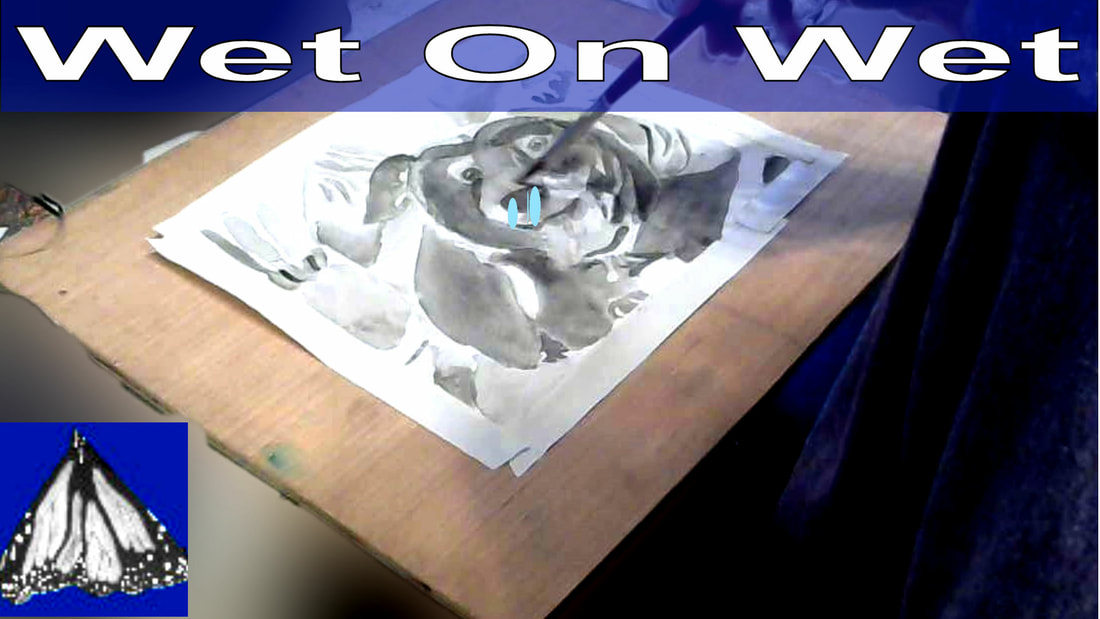
 The basic principles here are: wet-on-wet is good when you need two colors to blend into each other and need the edges to be soft on both. An example of this is shading/highlighting. In this instance, we’re going to have different colors next to each other, but since we’re not actually dealing with separate objects, we want our edges to be soft, and painting with the layers still wet gives us that. So, you might have already guessed, but if you need a sharp distinction between one color or shade and the next, i.e., if those colors represent different objects, you will want to use the wet-on-dry technique. This will create a harsher edge and thus a more precise distinction between the objects. For example, I wanted the nose here to stand out from the rest of the dog’s face, so I painted over it when the layer underneath was dry to make that separation. 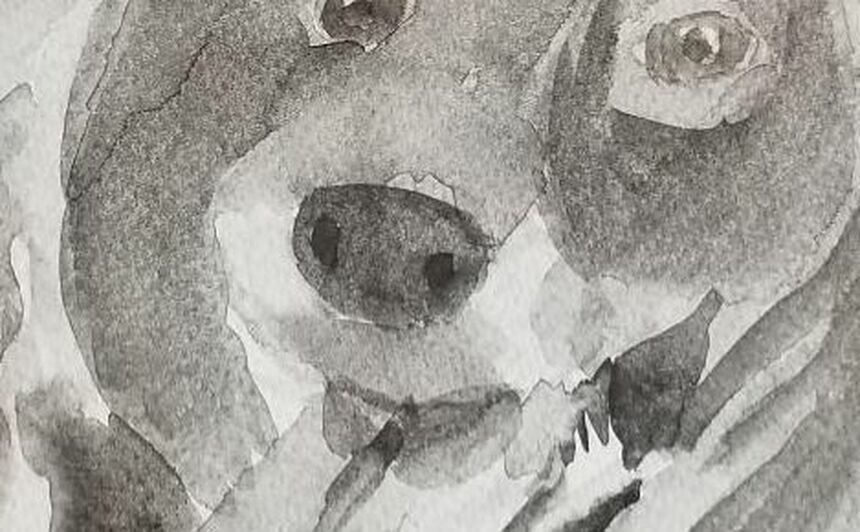 I know I said we use wet-on-wet for shading, but that depends. For smooth shading, such as this dog here, on even a person’s face who has smooth skin, yes, use wet-on-wet. But for things like deep folds in clothes, or wrinkles in a person’s skin, since these things require harsher separation from their surroundings, in those cases, we use the wet-on-dry technique for part of them. Even in these cases, though, you’ll probably need to have a little area surrounding the harsher lines that’s more blended for your wrinkles to look realistic. As you’re working, you’ll probably start to see what technique works best for what you want to accomplish with the particular part of the piece you’re working on. Okay, so that’s pretty simple. But working wet on wet can pose a problem. As you’ve heard me say before, watercolor goes where the water goes. That means, if you’re not careful, you can have paint go all over the place when trying to utilize this technique and that’s usually not what you want. I’ve been watching another artist named Sayanti Chadhauri. She has a youtube channel called Sayanti Fine Arts. Anyway, I was first inspired to explore the possibilities of what could be done with wet-on-wet when watching her videos. Sayanti uses this technique with remarkable precision. I asked her how she paints wet-on-wet without the paint going all over the place and I’m going to share on of the things she told me with you, and that’s to avoid pools of water on your paper. That is, keep your water layer relatively thin. Believe me; this has made all the difference. Since I started paying attention to how much water I’m putting down, my layers have been much more controllable. So wipe your brush on the edge of your water container and even dab it on a paper towel if you have to, before putting it to your paper. Don't stress out too much about which technique to use. You're going to misjudge sometimes. Use your eyes. If you use wet on dry and the edge is too harsh, soften it with a wet brush. This is easy to do while the paint is still wet. If you use wet on wet and the result is too fuzzy, dab it with a tissue and start over.
0 Comments
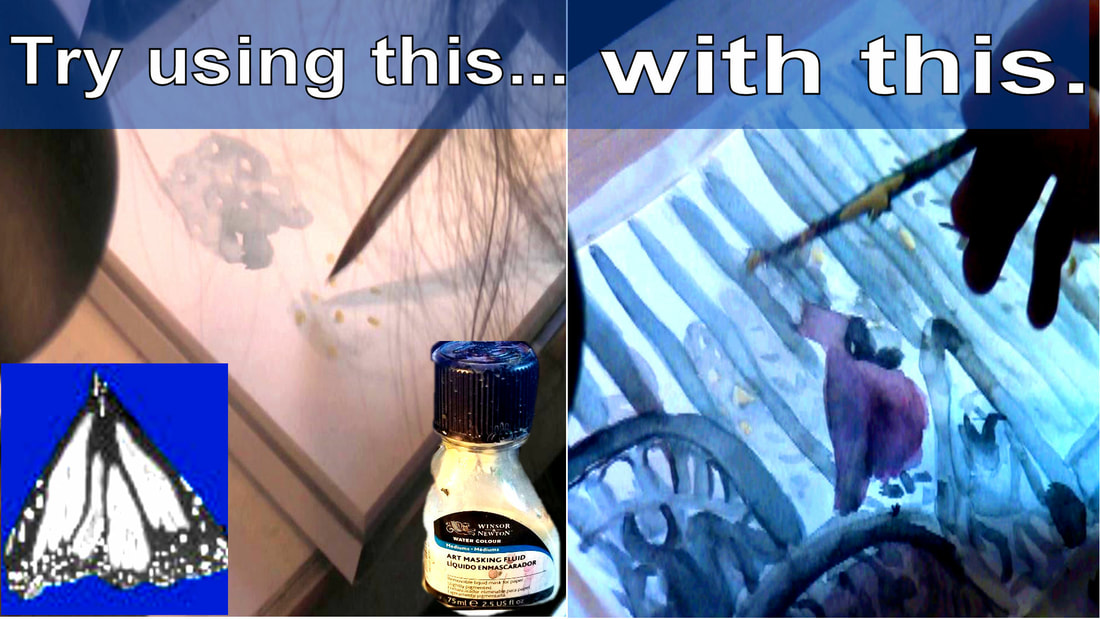 The most obvious reason to use masking fluid is it acts like a little stop sign to keep paint from getting on areas where you don’t want it. Meaning, that if you have masking down on an area and it’s dry, paint can’t go there. It literally stops it in its tracks. You never have to worry about accidentally painting over a place you wanted to keep white, no matter how small. A lot of times there will be very small areas that you want to keep white and trying to paint around these can be very stressful and time consuming and forget about trying to do this with wet-on-wet! A few warnings, though. 1. Don’t use any of your good brushes for masking fluid! Masking fluid will ruin your brushes. You’ll never be able to get it out completely. I use brushes that are damaged for masking fluid. You can buy a cheap brush or two for this purpose. For pinhead size whites, I like to use the head of a needle. 2. Don’t leave the masking fluid on too long. Masking fluid has been known to stain paper when left on too long, so if you want a clean white space, just put it on in preparation for painting the area you’re going to be working on in that session and peel it off once the paint is dry, which brings me to my last warning. Also, to avoid staining, try not to have masking fluid on an area more than once, especially if you’re using it to preserve that area as white. 3. Don’t start painting until your masking fluid is dry and don’t take the masking fluid off until your paint is dry. If you do try to paint while your masking fluid is wet, or remove masking fluid while your paint is wet, you’ll have a mess on your hands. You can buy special tools to remove masking fluid, but I just use my finger and I’ve never had a problem. I just rub it gently until it comes loose and either peel it or keep rubbing until it comes off completely. Besides using it to preserve whites, you can also use masking fluid to keep a certain color of small areas that you want to be a different color. For example, in my latest painting, I wanted the main part of the grass to be green, but I wanted there to be subtle bits of yellow in it. I used masking fluid to block off the parts that I wanted to stay yellow while I was painting my green on. I use Winsor and Newton's masking fluid. You get yourself some at this link. If you buy from that link, I get a small percentage. Watch the video below to see the steps I described above in action.  Last week, I explained that shading with black is usually a bad idea and offered alternatives. In this post, I'm demonstrating the importance of using multiple values to shade. You probably already know that the value you use to shade should. Just one value is hardly ever enough to get depth, though. I almost always use at least two, putting my lighter one down first.  Take the folds in Adelaya's top, for example. Of course, I used a darker blue than the base for the first level of shading. But then I used a darker, or blacker shade of blue, for the second level of shading. Take a look at my current piece. This is a close up of the cardinal in the black and white version. You can see I used a somewhat light gray for the base color. Then I added a slightly darker gray. Then I added a shade of gray that was quite a bit darker than that. That was my second level of shading. But I still wasn't done yet. I added a still darker shade than that one for a third level of shading. 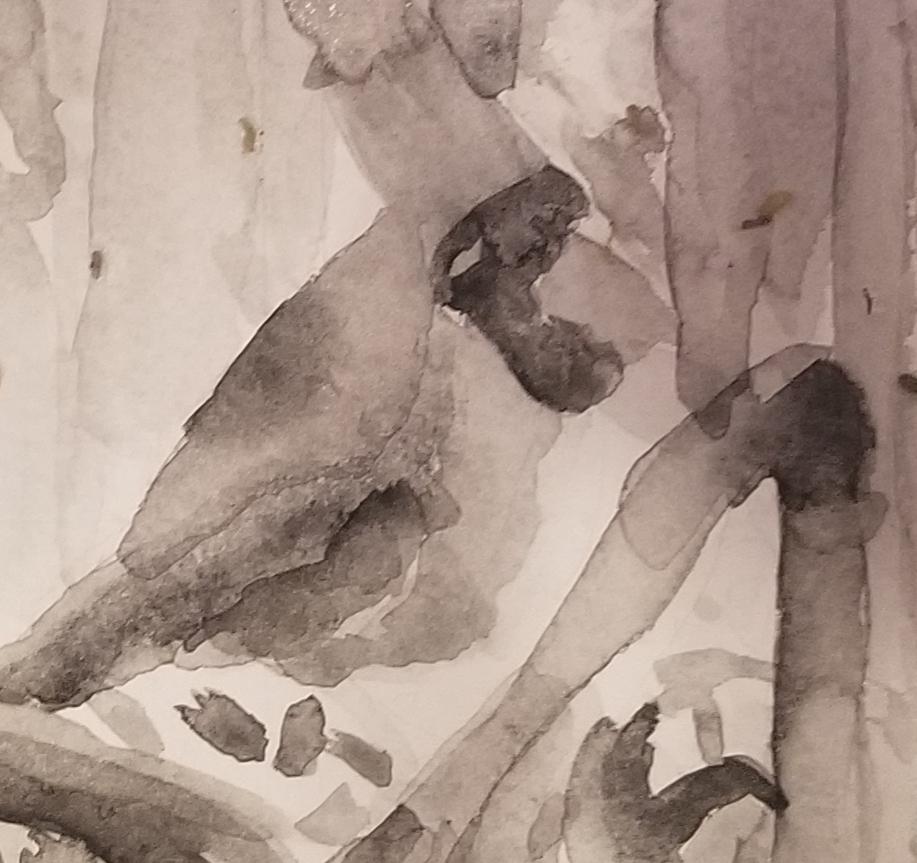 You might even find yourself using a different color entirely from either your base color, or its complement, in your shading. For example, I’ve shaded part of this red cardinal with purple. 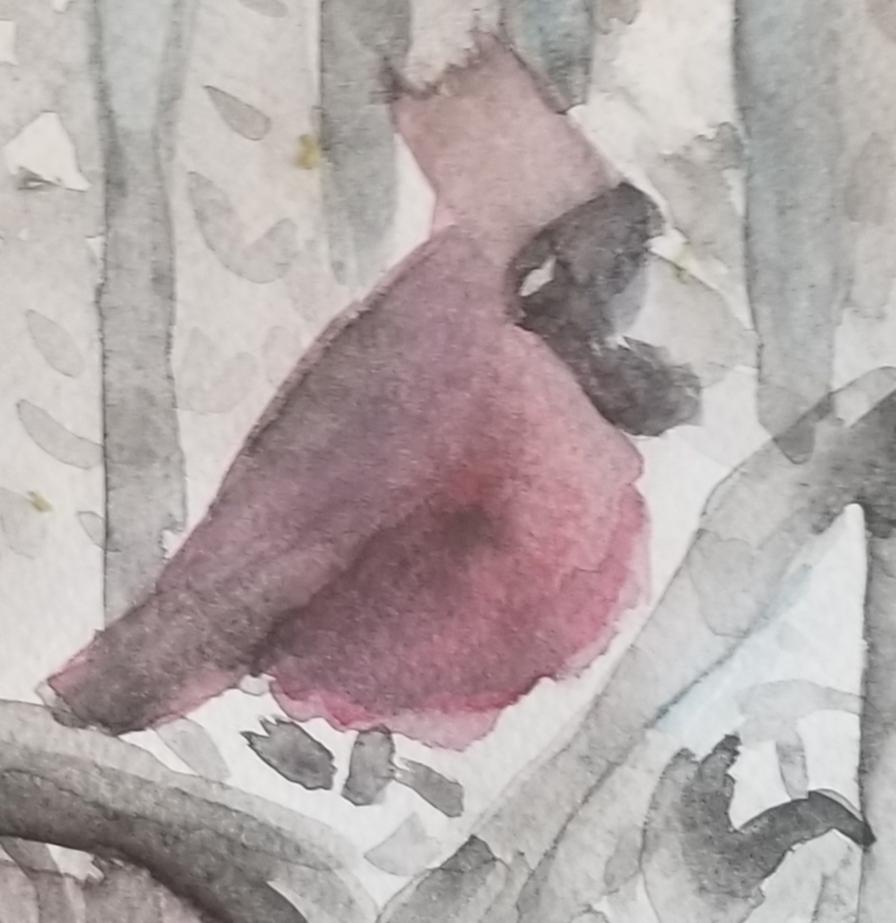 I want to give you an idea of what this guy looks like with only one level of shading.  You can see that, even though he's technically shaded, there's not much substance to him. There's no real contrast. It's not until I add the really dark darks, which offset the lights, that he really starts to come to life.  'See how some of the shading is almost black? I was worried that people might misinterpret what I was saying in last week's post. i wasn't saying to never use black for shading. I was just saying not to jump straight to black for shading. |