 When I'm drawing, I can find myself making the wrong line over and over sometimes. This usually happens when I spend more time looking at my paper, then at my reference photo or model. Looking at your paper while you’re drawing is logical. After all, we need to make sure everything is where it should be, right? But your paper doesn’t show you what you should be doing. Your reference photo or model does. This was brought into sharp focus for me when I drew from a live model in a free class last week. I struggled with her left cheek. I would look at the model for a second and then try to recreate what I saw. I’d be unhappy with it, erase it and try again. I must have done this three or four times at least. Then I decided I was going to look at the model as I was drawing. What do you know, it turned out right this time. There have been times I’ve had my eyes fixed on a model while my pencil is on the paper and I just quickly glance at my paper to make sure I’m in the right place, which is the complete opposite of what I described before, which is just glancing at the model and then keeping my eyes on the paper. This is especially beneficial when you're working on small details. I only recommend doing it for a few minutes at a time, though, as staring at fine detail can hurt your eyes. At least, it hurts mine.
2 Comments
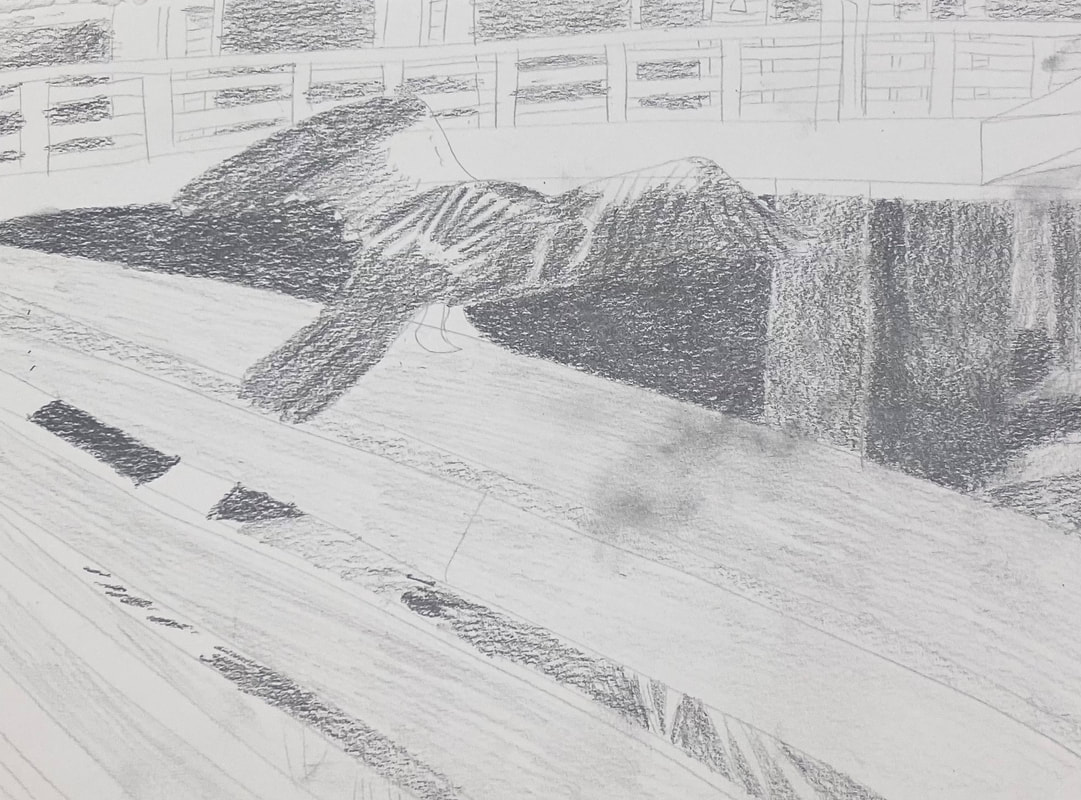
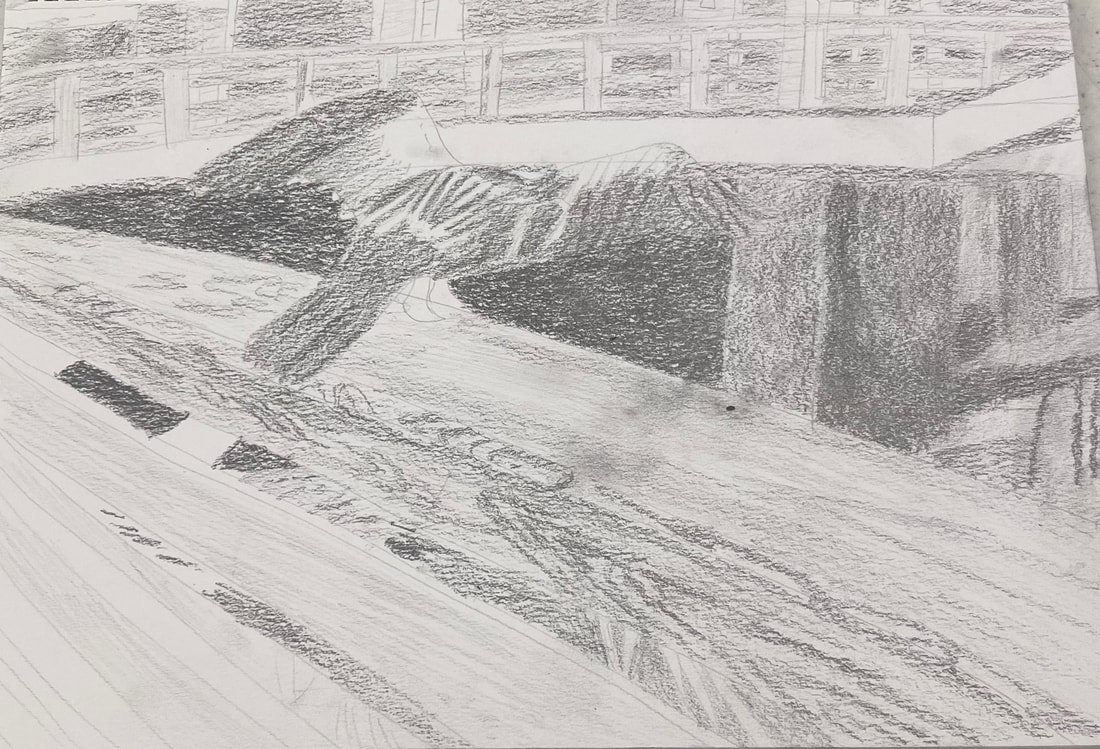
Paying attention to seemingly unimportant background details can make a big difference in your piece, because of the dimension these details add. This impacts your entire piece.
Take a look at the rails on the fence this bird is perched on. In the pic on the left, I have no pattern in the wood and in the pic on the right, I do. You can probably see that the first picture looks relatively flat in comparison. When I put the first curves of the wood pattern in, I could see the clear separation between the top and sides of the rail start to form. I was almost going to skip this part because it seemed boring and unnecessary. The bird is my focal point. As long as I have enough detail on him, I’m good, I thought. But giving the rails more dimension, by adding the details on the wood, also gave the bird more impact. Pay attention to your background and you can make your subject look even better.
 Today I decided to draw my family's new living room table to give myself practice drawing glass, using graphite. Glass, as you probably know, is very smooth. As such, I must keep my shading smooth while drawing it. This is not as easy you might think, as the edges of my shading tend to get ragged if I’m not careful. I had to give my full attention to what I was doing with my pencil while I worked on this. My pencils also needed to be as sharp as I could get them if I was going to achieve the level of smoothness I was after. I looked carefully at the rims of the circles and saw that there was some very thin, very dark shading around them. This provided necessary contrast, which brought out the reflective nature of the glass and made it look more three dimensional, as did drawing the reflection of the shutters. While I worked, I didn’t think about the fact that I was drawing a glass table. I only thought about where I was putting each bit of shading, how dark the shading needed to be, and about keeping the edges of that shading as smooth as possible. When I stepped back from it, I saw it come together, though.
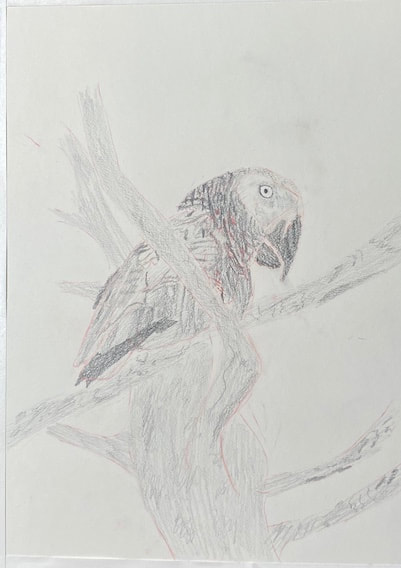
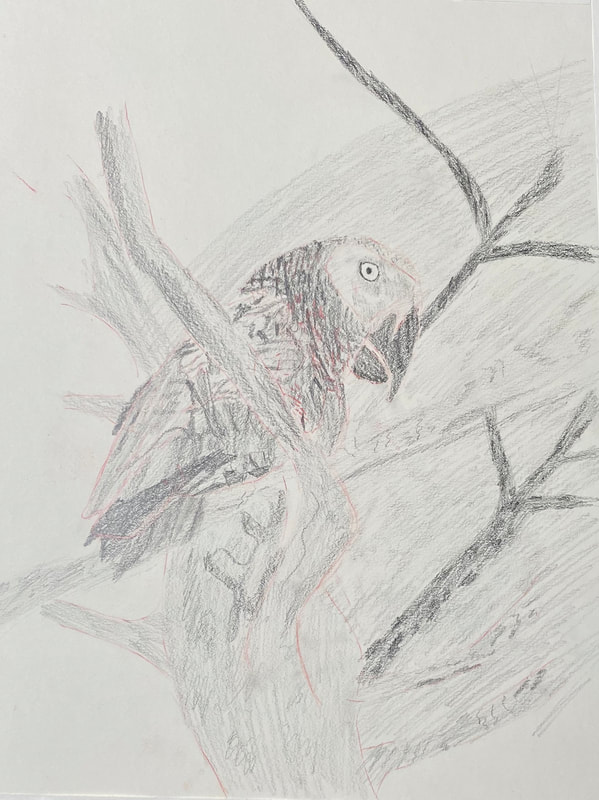
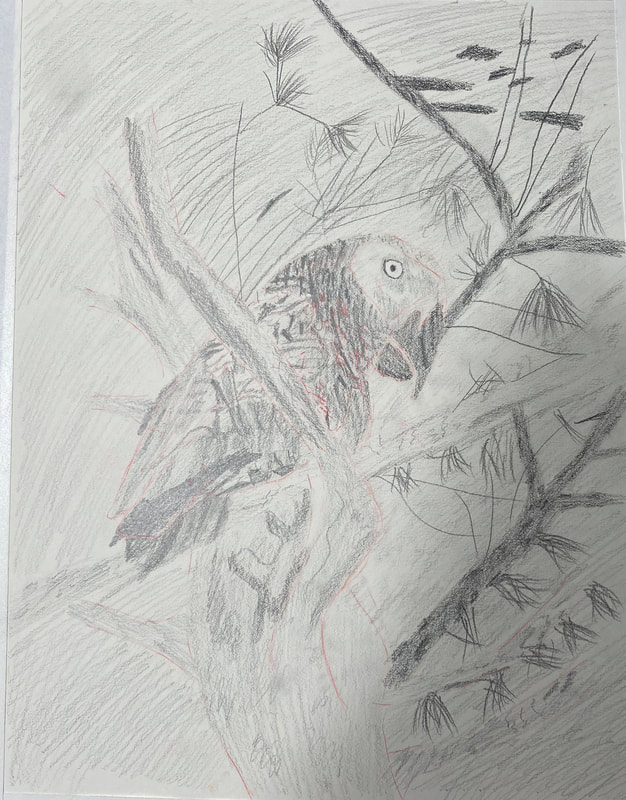
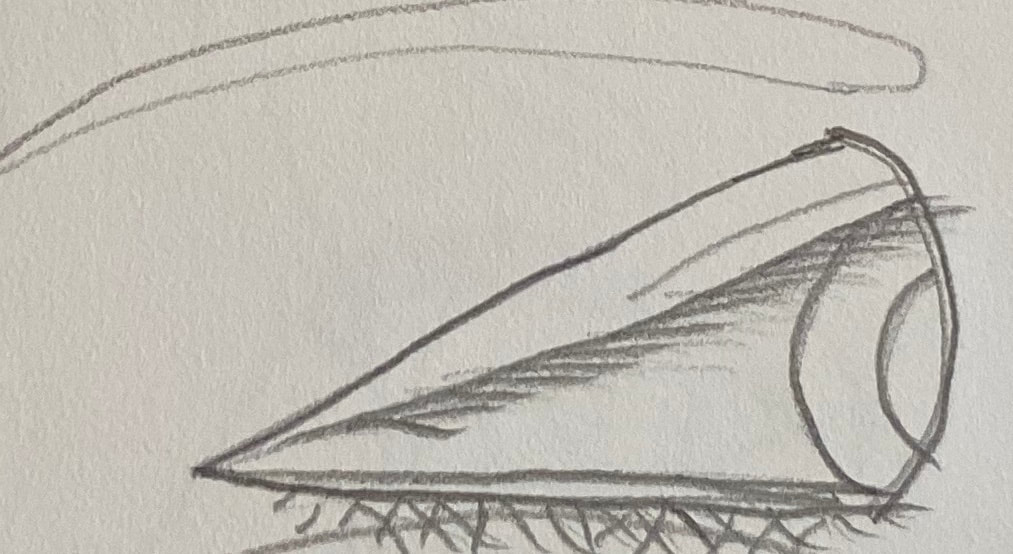
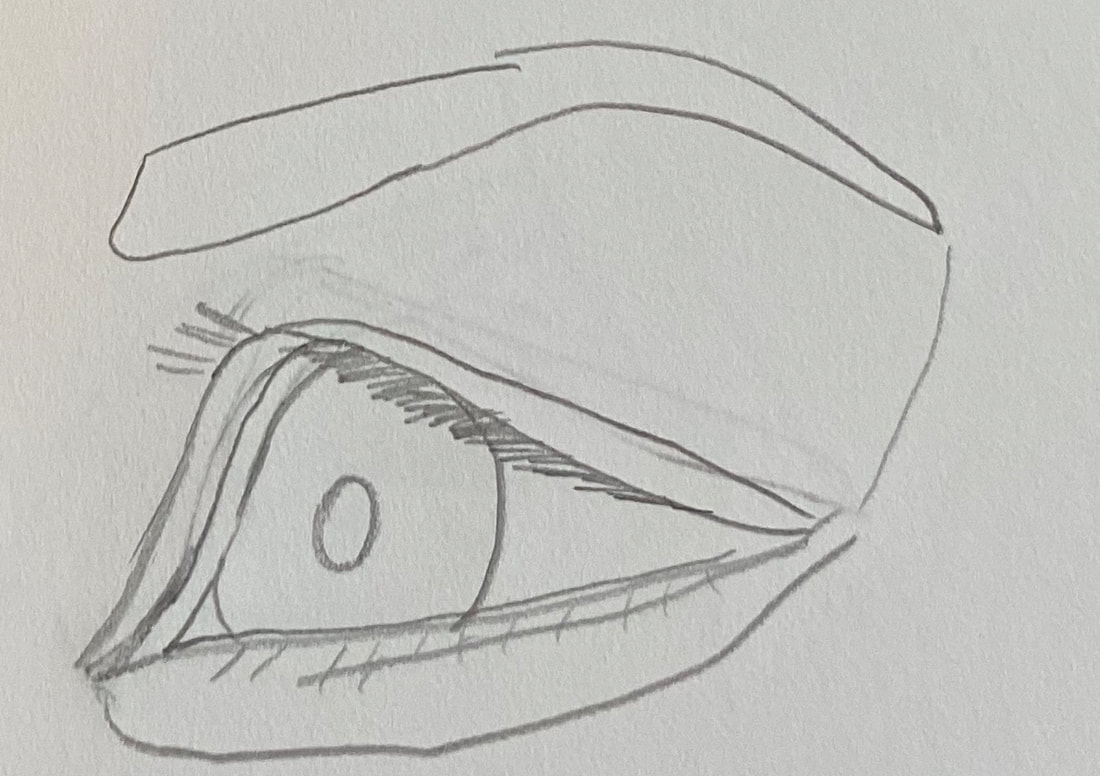
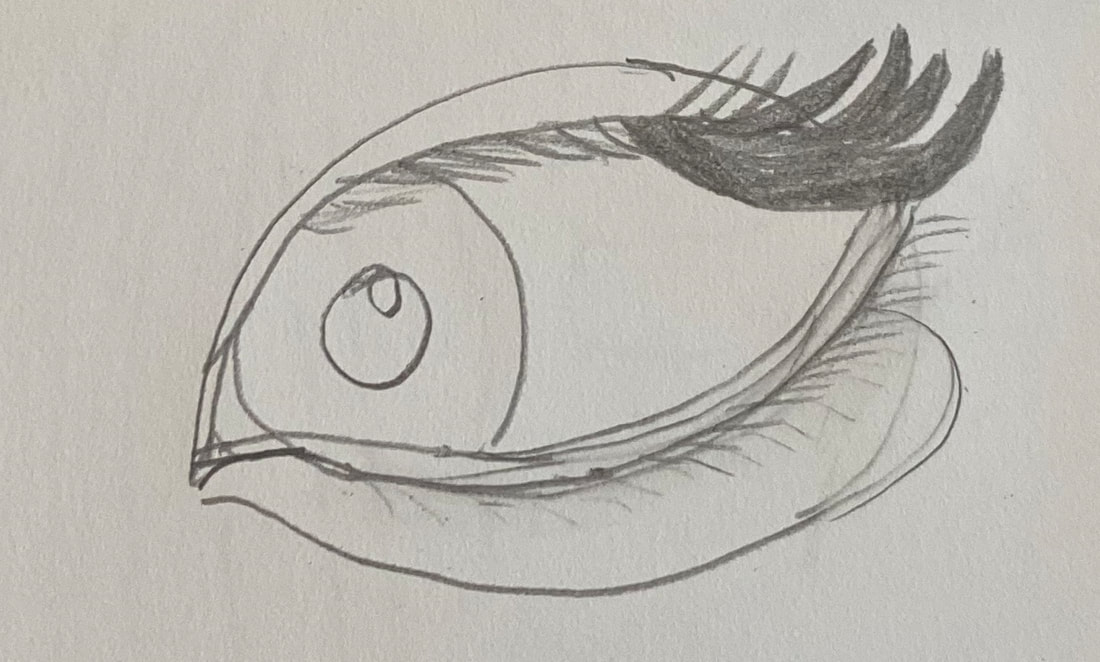
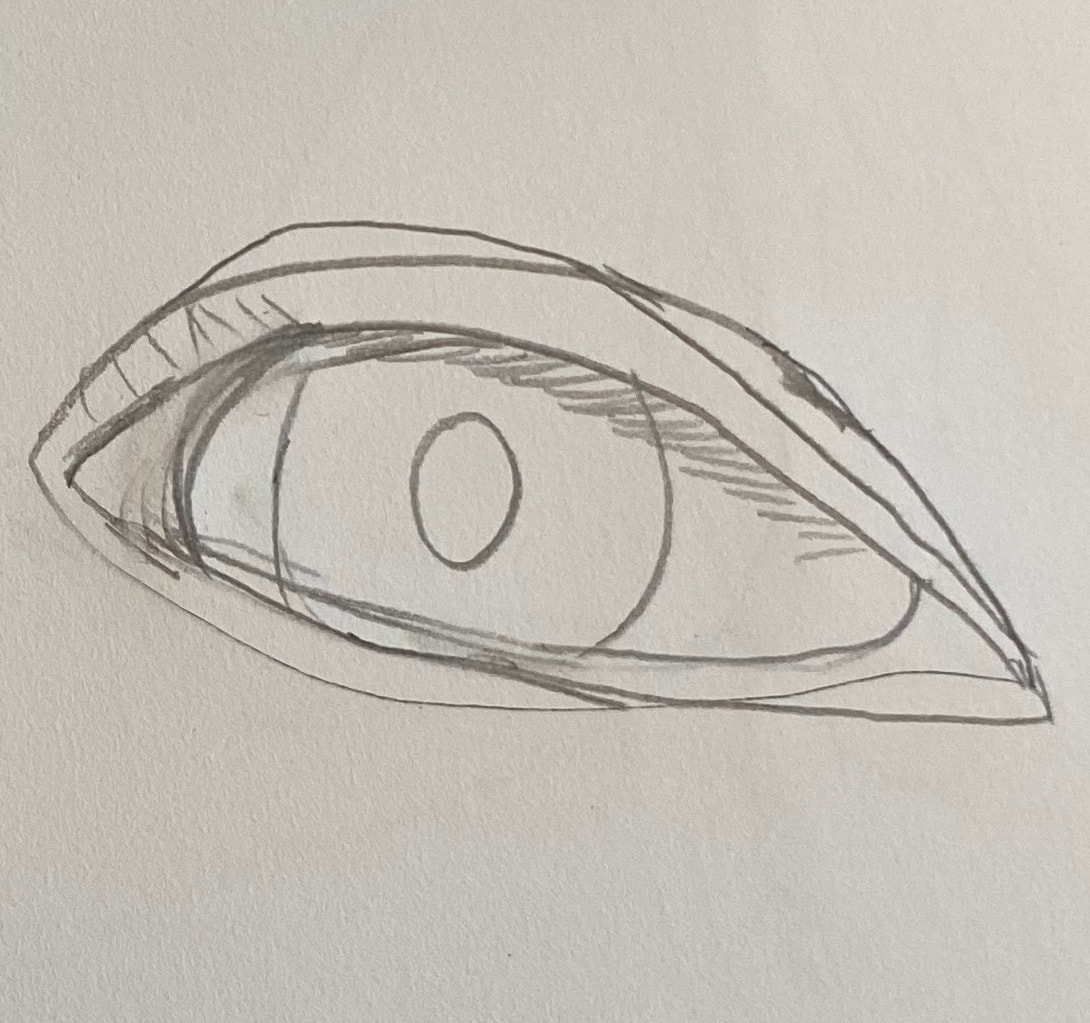
 I saw this bird once in a tree in a park near my house. It didn’t look like any common city bird you see around, so understandably, I was surprised to see it just chilling in a tree. I thought, that bird looks like something I might see in a zoo. How did it get in this park. I didn’t even know what kind of bird it was at the time. I guessed it was a kookaburra because it made a noise like one. I readjusted the lines of his body, particularly his head and the right-hand side of chest several times before starting on the details. While drawing his feathers, I made little flicks of my wrist. I almost drew them randomly instead of trying to draw each one in the exact right spot. By being overly careful, I could’ve easily fallen into the trap of drawing the feathers in rows and that wouldn’t have looked natural. You can be too careful sometimes. I drew my outline onto a separate piece of paper and transferred it onto my drawing paper using tracing and transfer paper. I don’t think I could’ve said the word paper more times in one sentence. When I started shading, I went right in with a 5b pencil, keeping a light grip on the pencil and going in little circles. This seems to make the shading more uniform than going back and forth. I blocked in his entire body with a 3b pencil. When it came time to add the feathers, I did so by shading in shapes that I saw in my reference photos. A lot of these were little triangles. Some of the feathers seemed to be groups of horizontal lines in rows. To draw these, I didn’t take my pencil and drag it from one end to the other in one motion. I made vertical back and forth motions with the side of my pencil in horizontal rows, keeping my wrist moving rapidly. Almost like scribbling, but not quite. It’s important that these lines curve in the right direction and that they’re approximately the right distance apart. Day Two I’m continuing to shade the feathers. It gets tiring staring so closely at all this detail. I look for where certain shapes of shading are in relation to each other and this helps me make the shapes of the feathers. I think more needs to be done on the tail, so tomorrow I’ll focus more on that in my reference photo. I’ve taken a closer look at his eye and the patch around it, which I can see now is not really white, and in fact, had much more shadow on it then I thought. The eye itself is very white and is surrounded by a ring of black, which gave it an eerie glow. I’ve started to fill in the tree branches with a 3b pencil as a base. Day Three Getting back to the branches, I drew the details on them by holding the pencil way back on the handle, using the side of the pencil, and wiggling my wrist back and forth. This made my strokes come out kind of zigzaggy. I didn’t want to take too much control and I didn’t want anything very uniform or perfect. I made sure to vary the size and thickness of my marks. Day Three Sometimes you try something new and it doesn’t work. I tried to create the texture of the feathers using only shading and no lines. It turns out though that, while the viewer doesn’t to see them, I needed some lines to guide me not only in the direction the feathers should go, but in how they should be shaded in the first place. Example: I drew in a feather with my 6h pencil next to one I already shaded. Immediately, I knew that there was a small area between the feather I’d already shaded and the one I’d just drawn that needed to be lighter than the surrounding area, significantly lighter in fact. Some things started to stand out to me during this drawing session, like the bird’s tail feathers and the underside of his belly. When I started to feel fatigued working on the details of the feathers, I thought it would be a good idea to direct my attention to the background. I was ready to start shading it in when I noticed the thinner branches in between the thick ones I’d already drawn. I drew those in with my 6h pencil and filled them in with a 6b as base. Day Four I finished filling in the background with my 3b pencil. I had no idea what I was going to do after that, so I looked at my reference photo to give me some guidance. I went to work drawing more thistles on the branches. I just let my wrist flick as I did so, not being too careful to put every line in the right place. The only thing I was concerned about was that they were adequately filled in. I didn’t want a lot of space between my lines. Day Five After a little break, it was time to get back to work on this. WOW! It’s amazing what a little sharpening can do! I just went over a lot of what was already on the paper with sharpened pencils and it looks so much smoother. Day Six I figured out I needed to go over things with more layers. Just because there’s pencil on the paper, doesn’t mean something’s finished. There shouldn’t be any white of the paper showing, unless, I, the artist, want there to be. There certainly shouldn’t be any white of the paper showing just because I don’t have enough pencil on the paper. I don’t push as hard as I can and go at it with the pencil, though. I build it up a little at a time, keeping a light hand. Drawing eyes in profile and three quarter view is different from drawing them head on. At these angles, certain things like the waterlines, and the setting of the eye in the socket will be emphasized. The eyes may even appear to be different shapes.
In summary, start with a sideways "V", pay attention to how the waterline curves and follow it, keeping in mind that it may be more visible at certain angles. In quarter view, the setting of the eye in the socket is more visible, and the eye is usually more curved on top and flatter on the bottom.
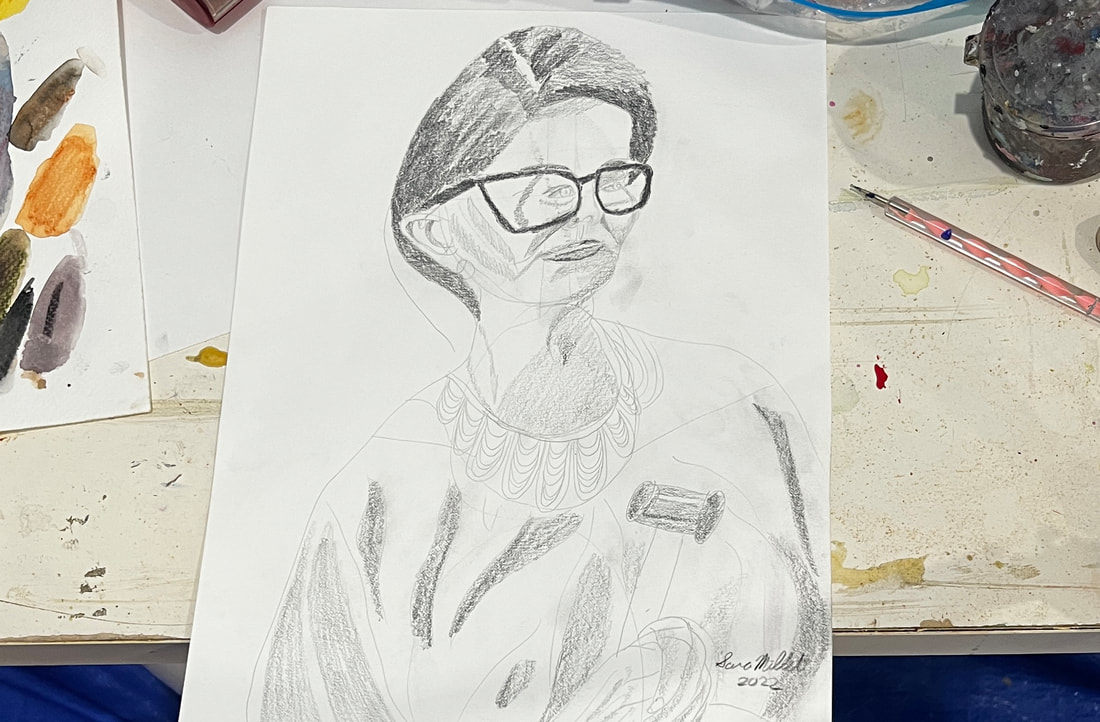
A while ago I took a class in portrait drawing in which I picked up some tips that I think make drawing accurately proportioned faces fast and easy. They involve drawing basic shapes and then refining them and using lines to show where particular features will go. In the video below, I walk you through the process of drawing both a face looking straight on and one with a tilt, so you can see that even a slanted head doesn't have to be intimidating to draw. |