|
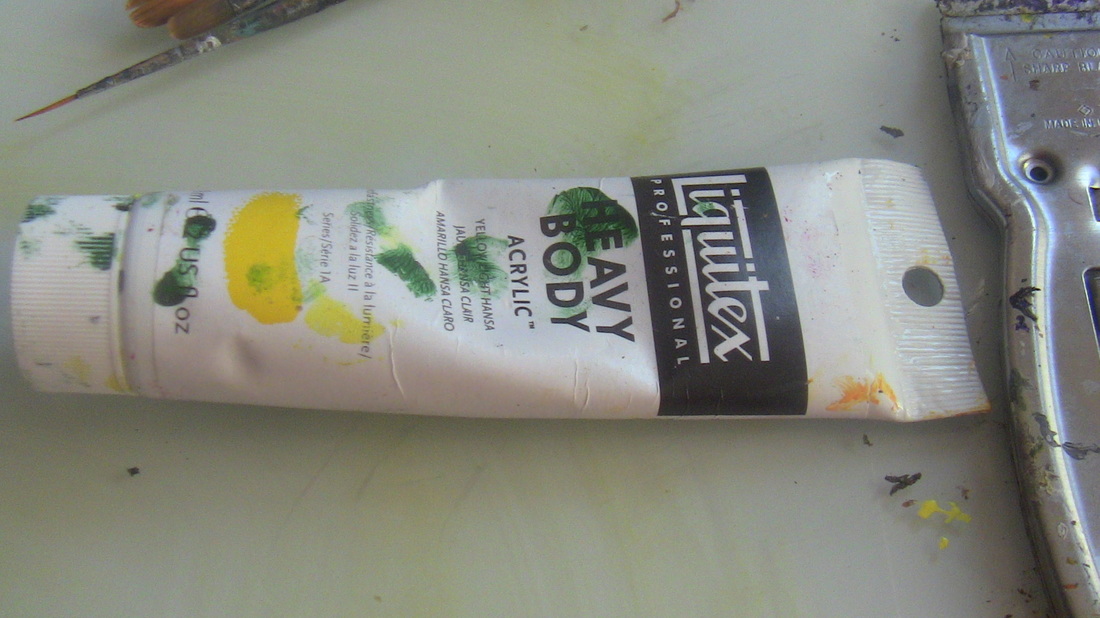
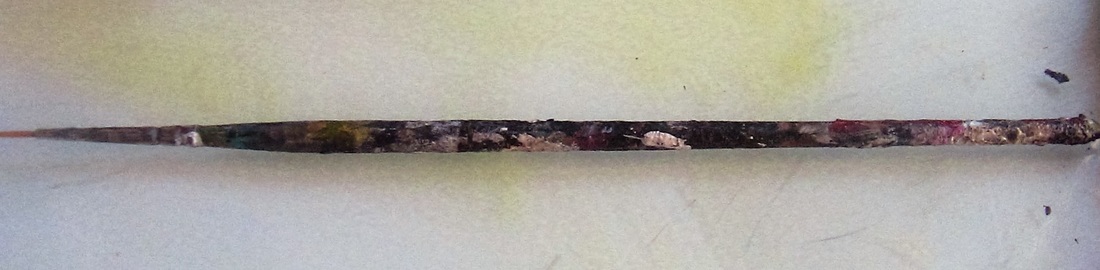
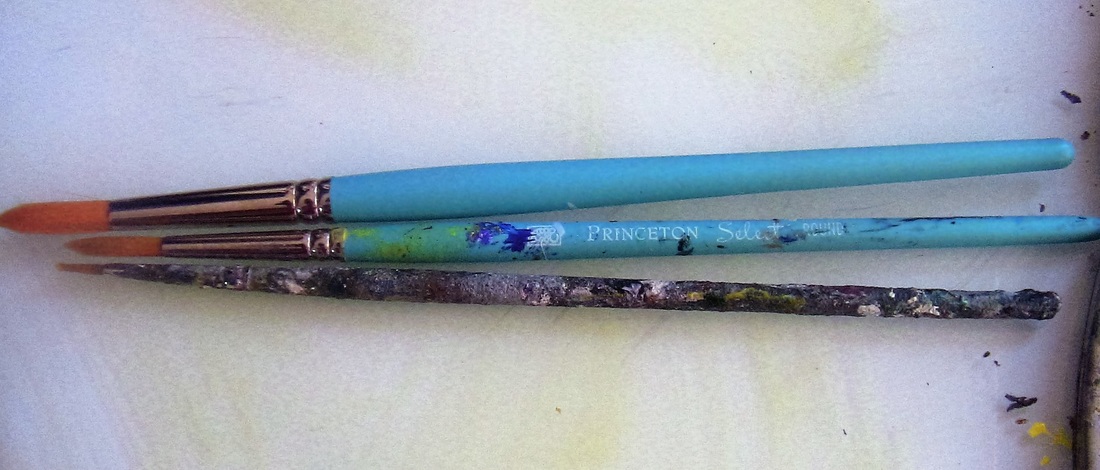
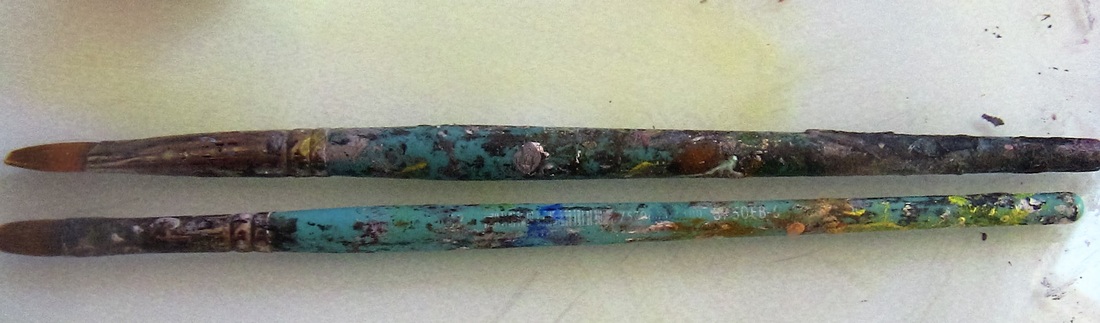
I already made a post about my graphite drawing supplies, and now I'm now I'm covering what I use when I work in acrylics. 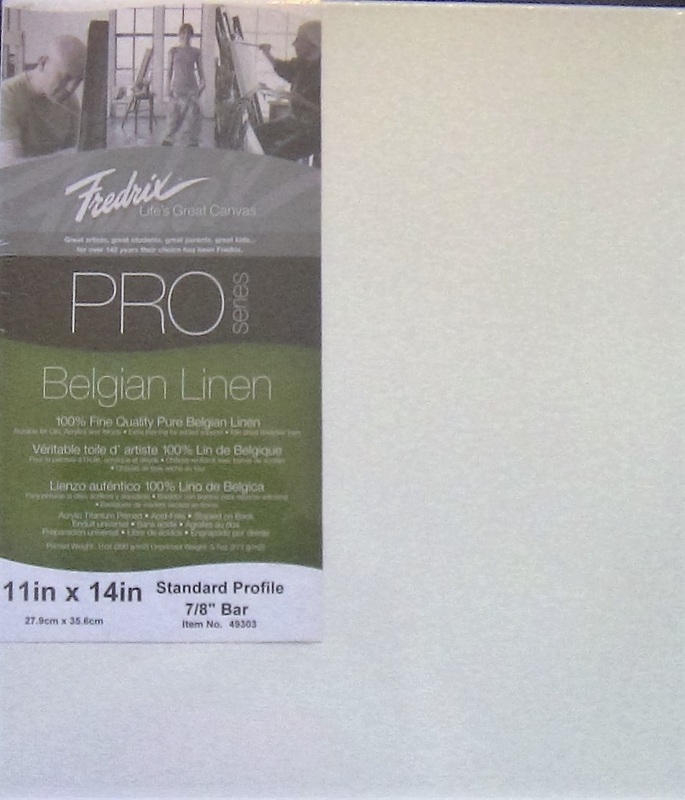 Again I'm starting with the surface. My last several pieces have been made on Fredrix Green Label canvases, which are Belgian Linen canvases. The artist Lisa Clough of Lachri Fine Art turned me on to them through her videos. I've also used a brand called Art Alternatives. I can't write a post about acrylic painting supplies without talking about the paints themselves. I've been using Liquitex paint almost ever since I started painting in acrylics. I started with their Basics line and I still have many tubes of it. I also occasionally use Liquitex's Heavy Body line. Lastly, I've started to use the Standard Series line from a brand called Amsterdam, which is part of a larger line called Royal Talens. I've found it to be similar to Liquitex Basics, but with a slightly different color range. There are a lot of transparent colors in this line, so it's great if you like to glaze. For brushes, I use the Princeton Select line. There's no special reason for that, except that they work, I can afford them, and I store I go to carries them. There are four types of brushes I have to have. The first are round brushes(top). These are for making lines that are thicker than what I would make with a liner brush(second from top), which is for making the thinnest lines possible. The third of these brushes is a filbert(third from top). I have these in several sizes. I use them for pretty much everything that I don't use either a round brush or a liner brush for. Because of their round edges, filberts are really good for keeping your brush strokes from showing. The last of my must have brushes are mop brushes(bottom). These are unique in that they are never used for scooping up paint from the palette and applying it to the canvas. Instead they're used for smoothing out brush strokes and blending shades into each other when paint is on the canvas. Like my filberts, I have these brushes in several sizes ranging from very large to very small.  I like to thin my paint with something before I put it on the canvas a lot of the time, so for that I use a matte mixing medium. The one I'm currently using is from Liquitex. I can't forget my palette. I use a glass palette from artist and craftsman supply. It's super easy to clean, even when paint is dry. I used to use wooden palettes, but I was turned on to glass when I experienced how nice it was too paint on in my painting class at the San Diego Art Academy. I can honestly say, I don't think I will ever go back to wood again. Maybe I will do another blog post about wooden palettes vs glass palettes. 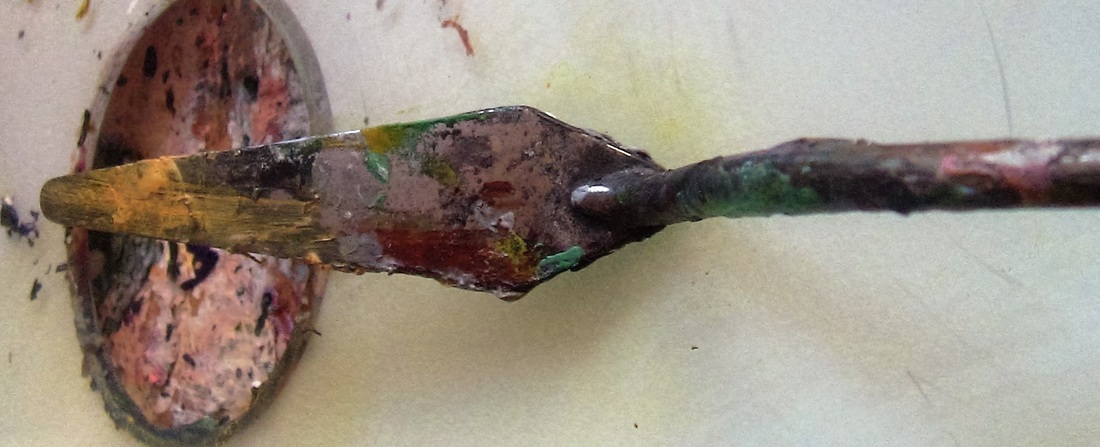 I use a palette knife to mix my paint. There are many different shapes and sizes of palette knives. You can also use a palette knife to paint, but I personally don't use that technique. At least not now. I also need paper towels and something to keep my water in. I use an empty yogurt container. I got the idea from my painting class at the San Diego Art Academy. Because the container holds so much water, it doesn't get dirty quickly, which is a big bonus. Here's a video to accompany this post. I promise your email will not be published.
0 Comments
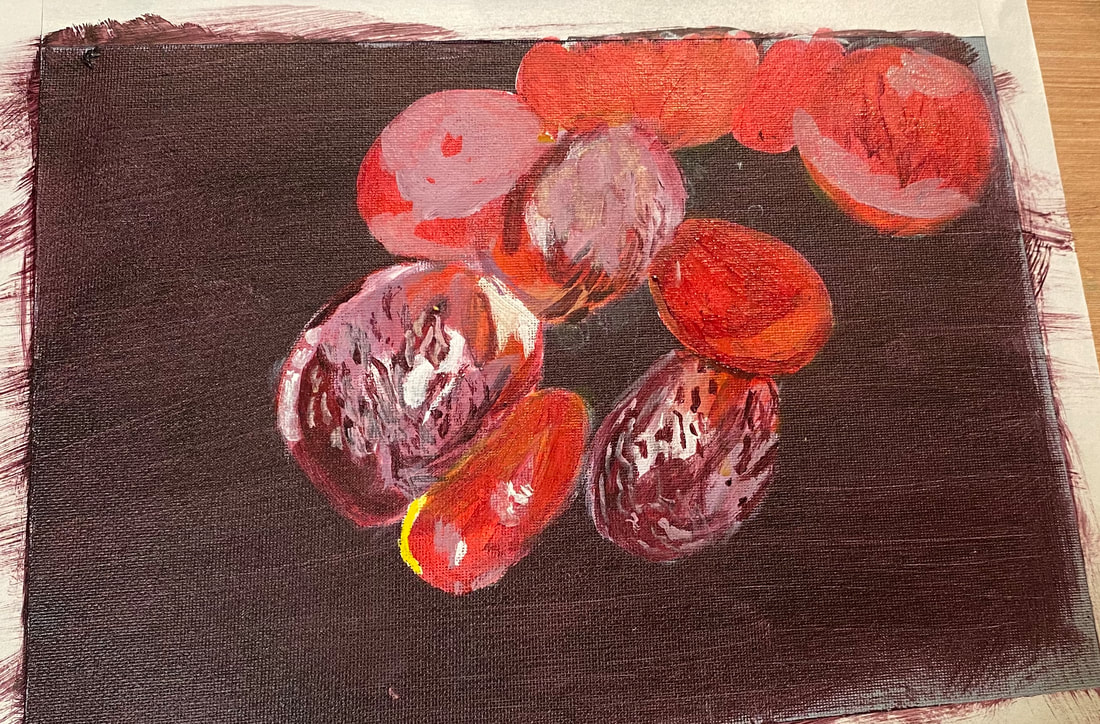
I finished “Little Girl In Pink Satin”! It’s an 11×14 acrylic on canvas. My reference photo is from Glennis Weston at Paint My Photo. 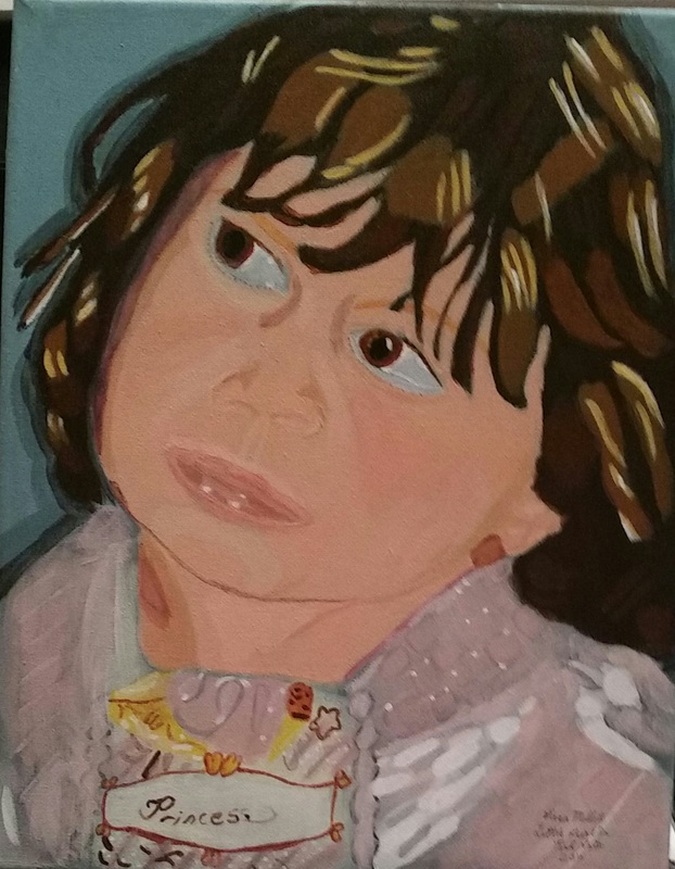 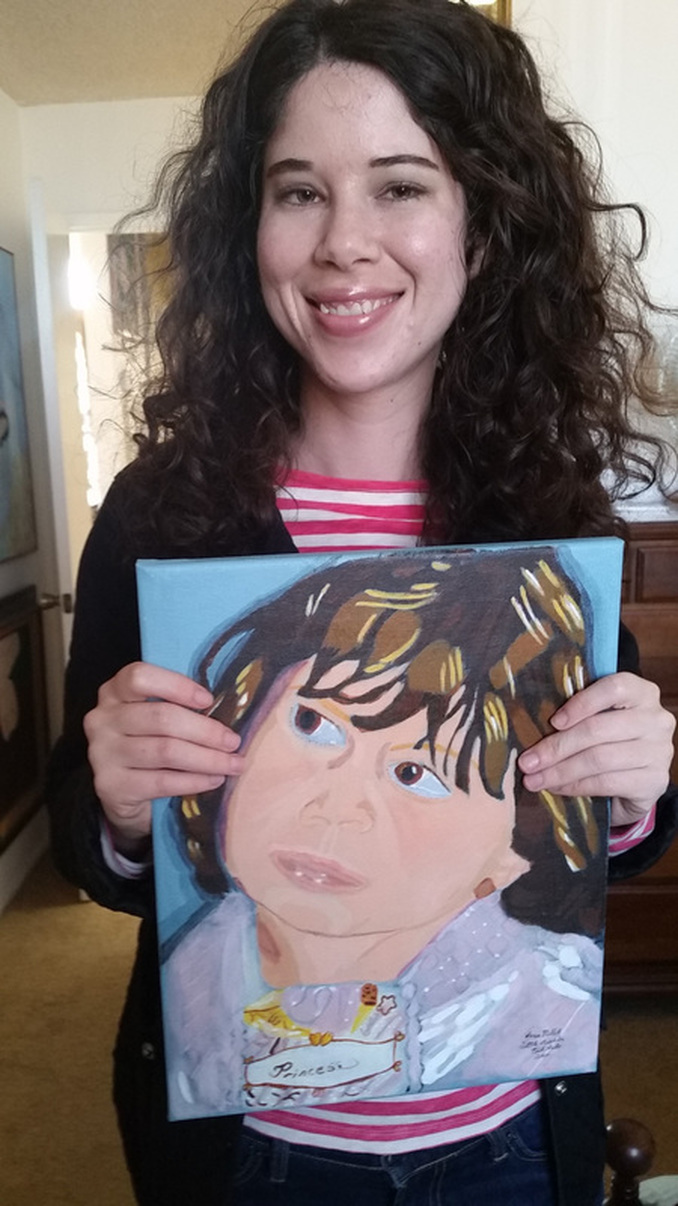 Here’s a pic I asked my mom to take of me holding the painting. Thanks, Mom. This is my first painting of a small child and thus a challenging endeavor for me. I made a conscious effort to draw the girl’s face as accurately as possible. I used guidelines, drawing two diagonal parallel lines to make sure I got the tilt of her head right. As far as painting, my goal was to capture the glow on her face and the innocence of her expression and of course, the satinyness of her dress, hence the title. I was surprised how effective adding the pink into her cheeks was at accomplishing one of these goal. I’ve known I need to practice depicting children, and I’m hoping to be able to confidently offer commissions to paint custom portraits of them 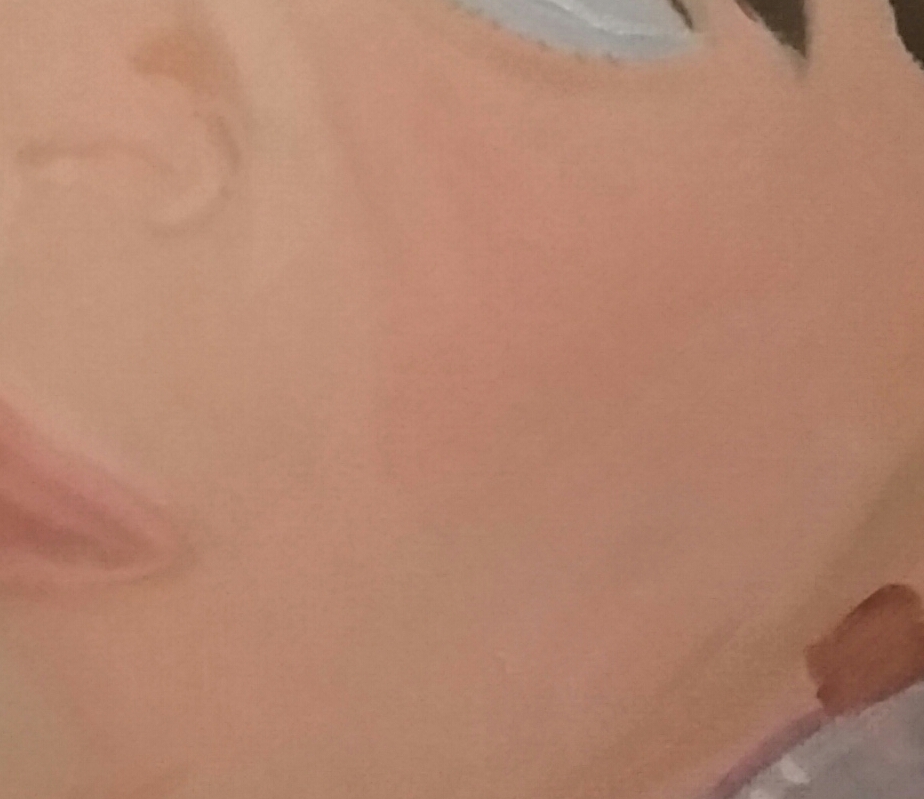 I’ve utilized transparent mixing white as well as tiny touches of titanium white in her lips, hair and clothes, to create the look of shine. I’ve found this to be more effective than using mediums designed to make your painting look shiny. I had thought the center of her dress was solid yellow, but the next day, when I looked at, I noticed there was greyish pink and blue streaks of light going through it. When I added these streaks and blended them out with a mop brush, the dress looked much more luminous. If you want something to look radiant, it hardly ever works to paint it just one color. 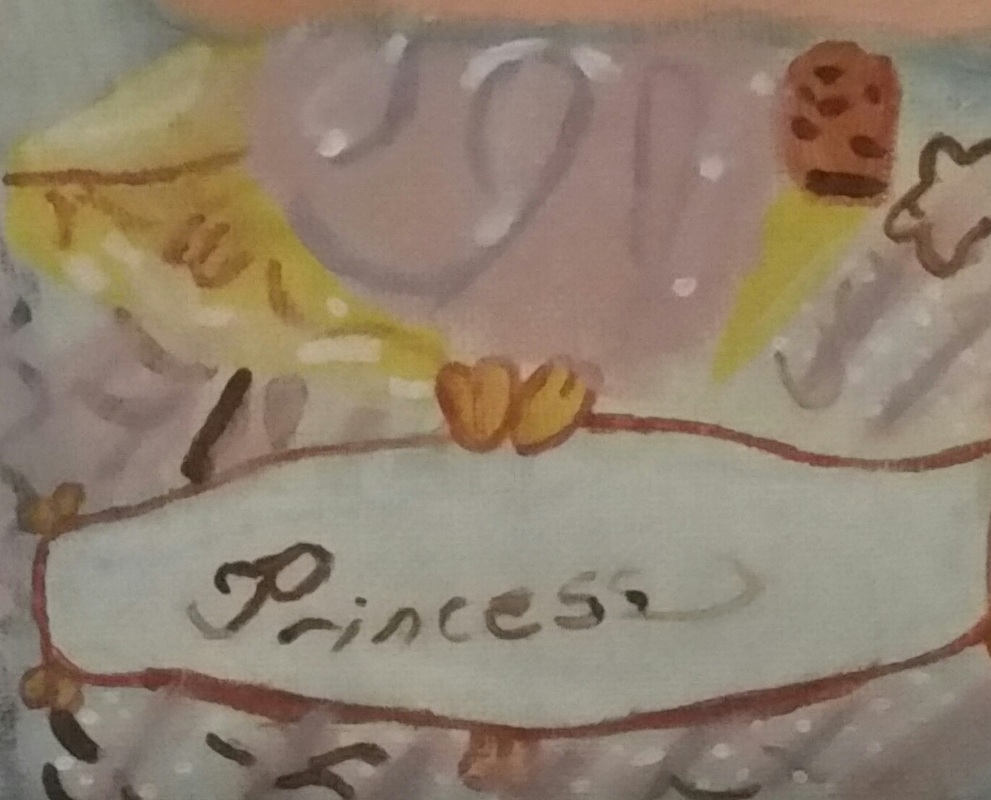 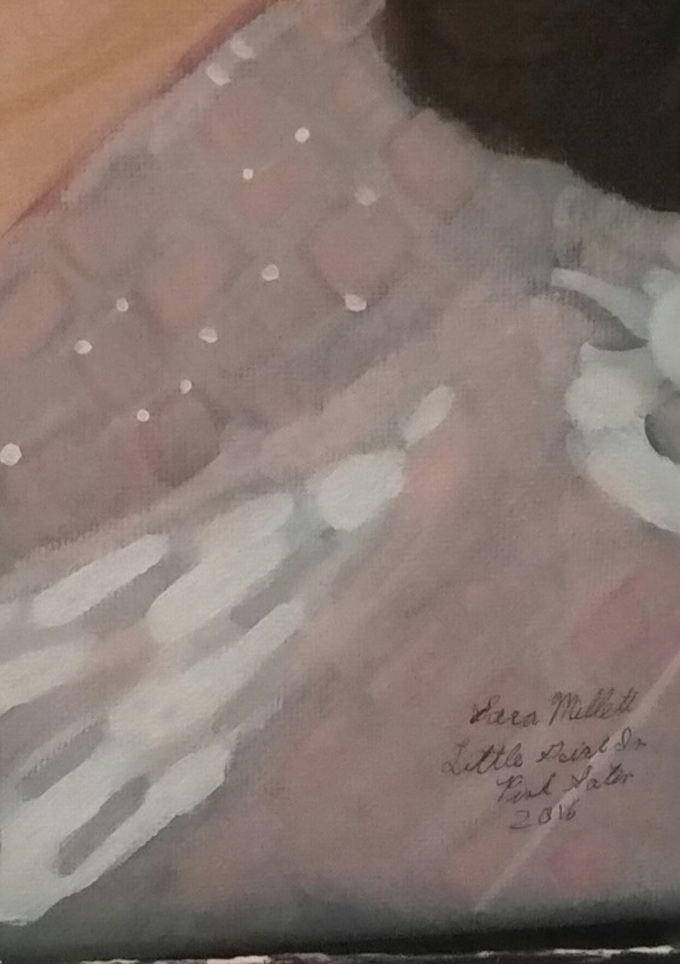 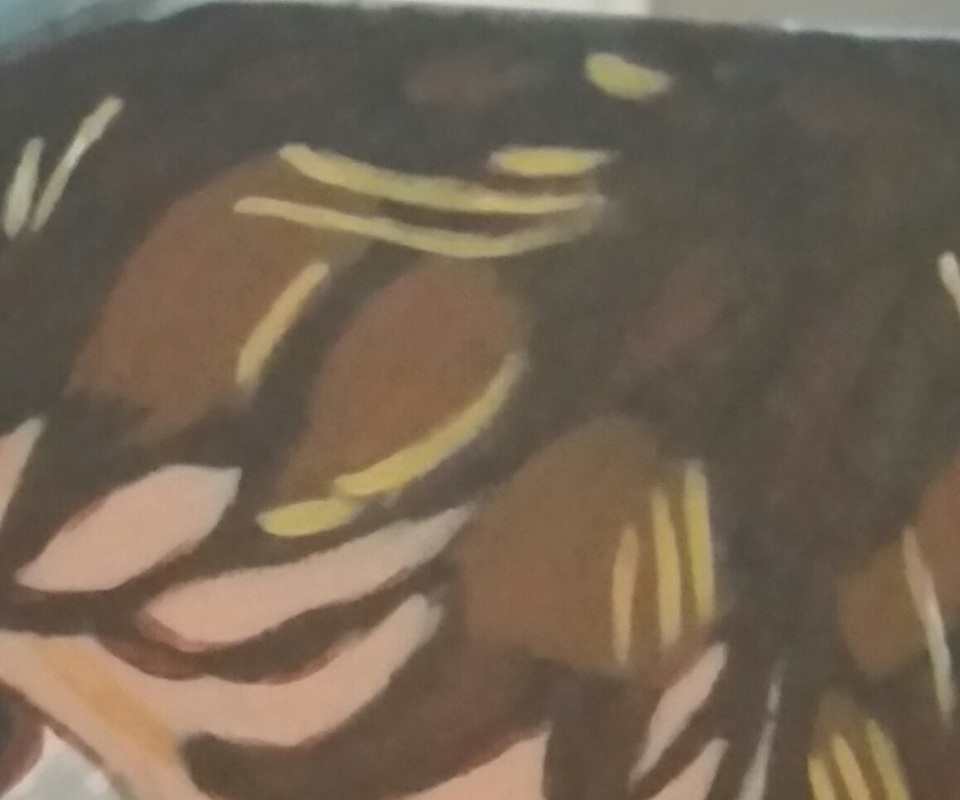  I decided to do something I don’t normally do on paintings with a solid background like this and that’s put a shadow around the subject. This is to make it look more 3 dimensional. That’s all for now. I’ll have another painting/drawing post for you next Monday. I promise your email will not be published.
Yesterday, I published a whole post about my drawing supplies, and in this video, I explain why I always carry a sketchbook. I promise your email will not be published.
I thought it was time I wrote something about my supplies. This post will be about my graphite drawing supplies, while another post will be about my painting supplies. I want to mention that I don't have many brand loyalties. I usually just use whatever Artist and Craftsman happens to carry.
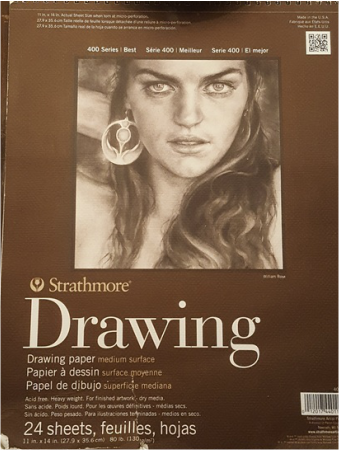
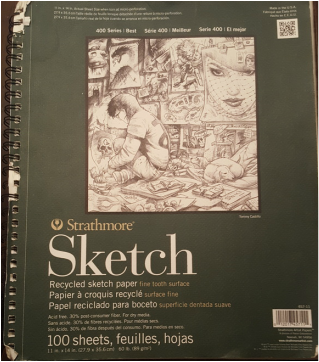
For many years I've been using Strathmore paper. I use their 400 series line in which I buy both drawing and sketchbooks. Occasionally I'll use another brand, but 90% of the time, I'm using Strathmore for paper. Both of these contain 80lb paper, which I would consider my absolute minimum weight requirement for drawing paper.
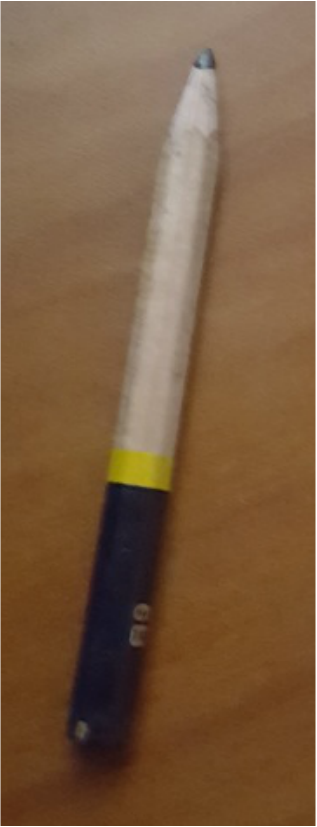
When it comes to pencils, I'm kind of all over the place. I was using a brand called proart for a while and I still have a lot of their pencils. I've been been buying a lot of my new pencils from a brand called Koh-1-Noor, which is a Czech brand. I have both hard "H" pencils and soft "B" pencils. The B stands for blackness. I have a video on the proper use of both of these kinds of pencils. You can watch it here. 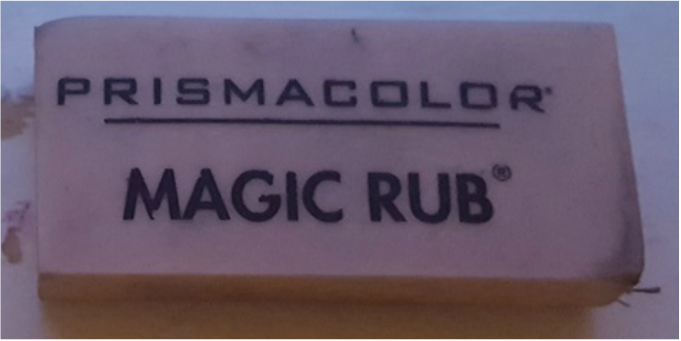 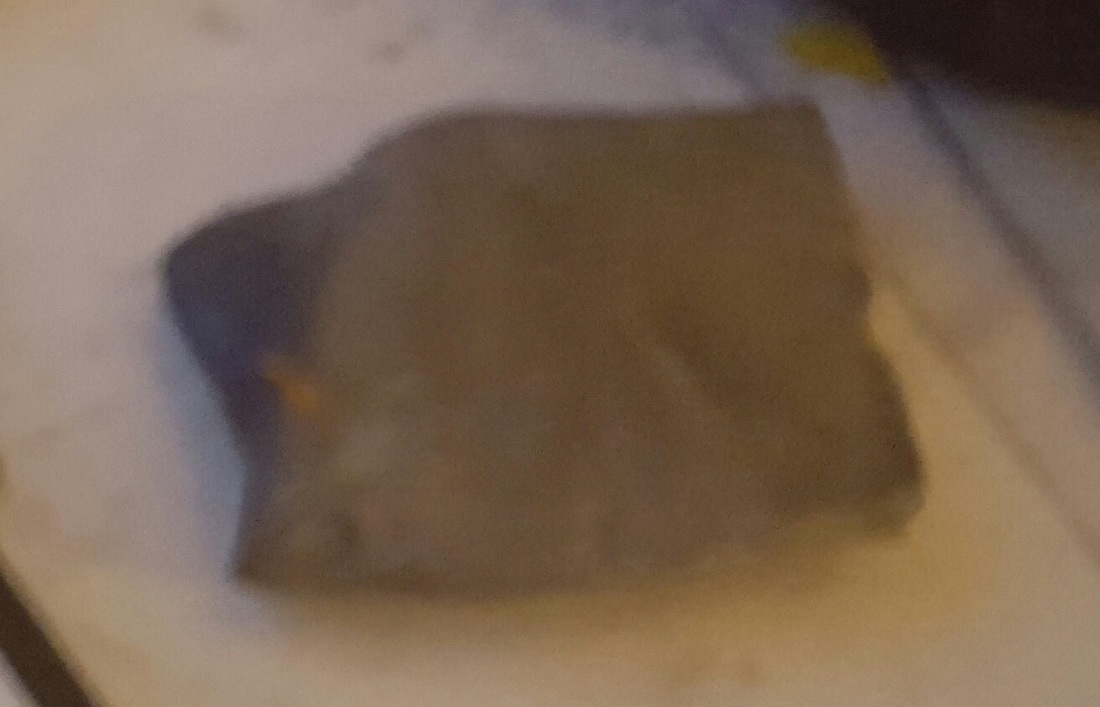 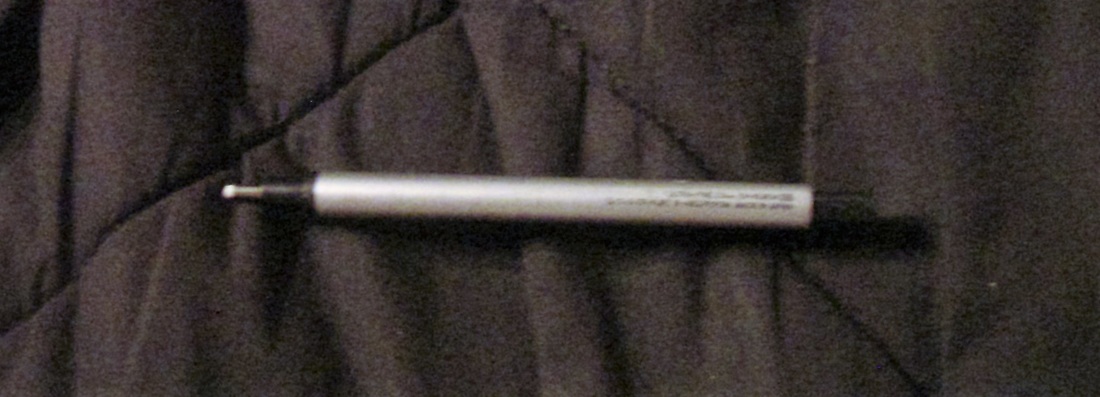 Of course we have to talk about erasers. Every artist needs at least two types of erasers. The first is a regular rubber eraser. I'm loving the magic rub one from Prismacolor.(Top) This is for erasing line work. The second is a kneaded eraser,(middle) so called because it can be kneaded, or reshaped to suit the artist's needs. I use the one from Prismacolor again. This type of eraser is not for actually erasing, but for lightening areas that are too dark. You lightly dab your drawing with it until you achieve the desired lightness. If you want fine detail in your work, I recommend getting a stick like eraser such as a tombow mono(bottom). 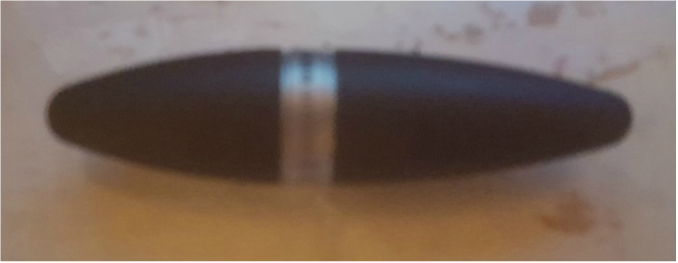 Of course I need a pencil sharpener. The one I'm using now is this torpedo shaped one. I'm not very picky about sharpeners, but I really prefer them to have a catch for the shavings. I hate those sharpeners without catches, because, you know, it's messy. Catches just keep things nice and neat. 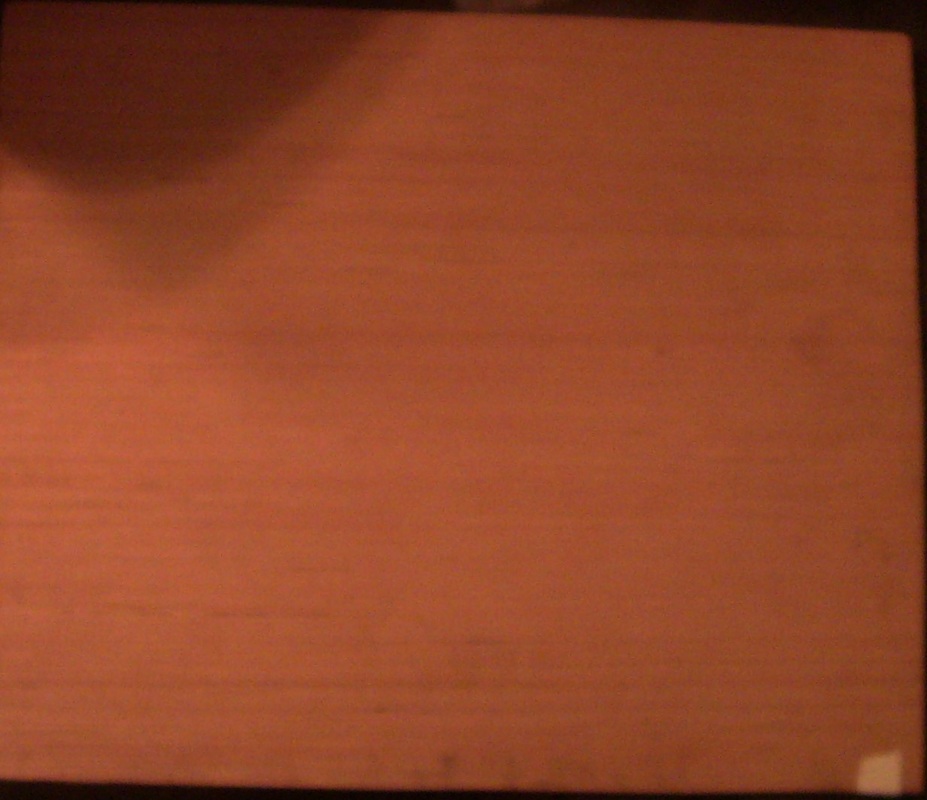 Real quick I'm going to go over my extra supplies. First is a board to put my paper on while I'm working. The one I use is one my step-dad cut for me.  Next is some tape to fasten the paper to the board while I'm working. I also use this tape to fasten the glassine that I keep under my hand to keep the oils of my hand off my paper. I have to tape glassine down because I draw upright when I make my videos. Lastly, like I said, I need some paper, such as glassine under my hand while work, so the oils of my hand don't get onto the paper. I promise your email will not be published.
|